Go to your AWS login page and log into your AWS account. If you do not have an account, proceed by creating a free account. Once you log-in, you should see a page as shown below

Search for CodeCommit and click on that service. Further, click on Create Repository to create a repository.

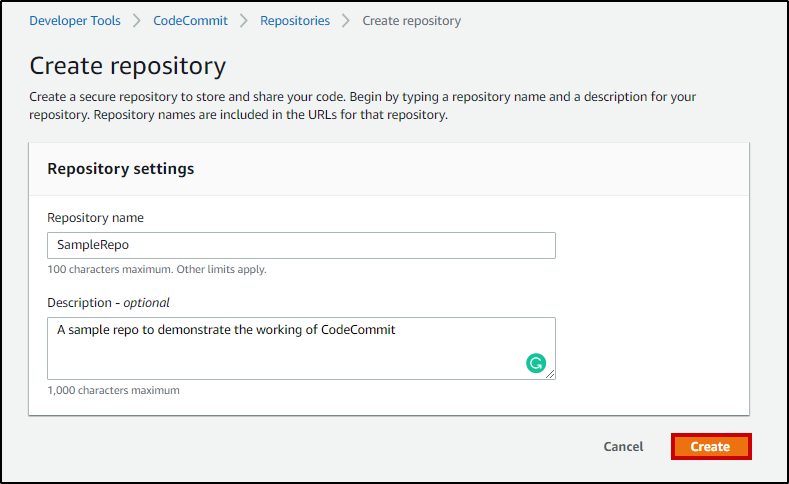
You’ll be prompted to add your Repository Name and Description. Add those and click on Create.

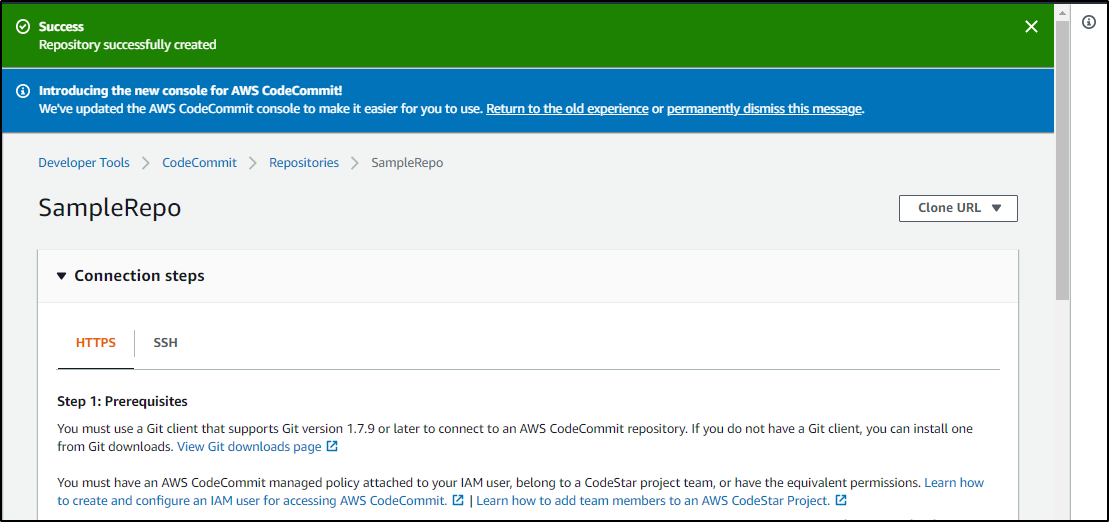
You should something similar to this, notifying a success for creating a repository.

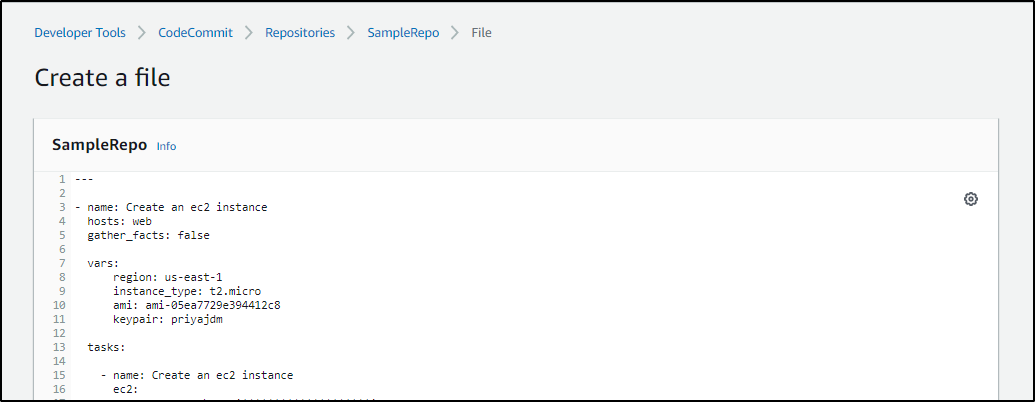
There are two ways of connecting your repository – SSH and HTTPS. In this case, I’ll be using HTTPS. Now that a repository has been created, go ahead and create files in the repository. When you create a repository, it’s always empty. You’ll have to create and add files. Get inside the repository that you’ve created and click on Create file.

Once you’ve created the file. Go ahead and add code to the file.

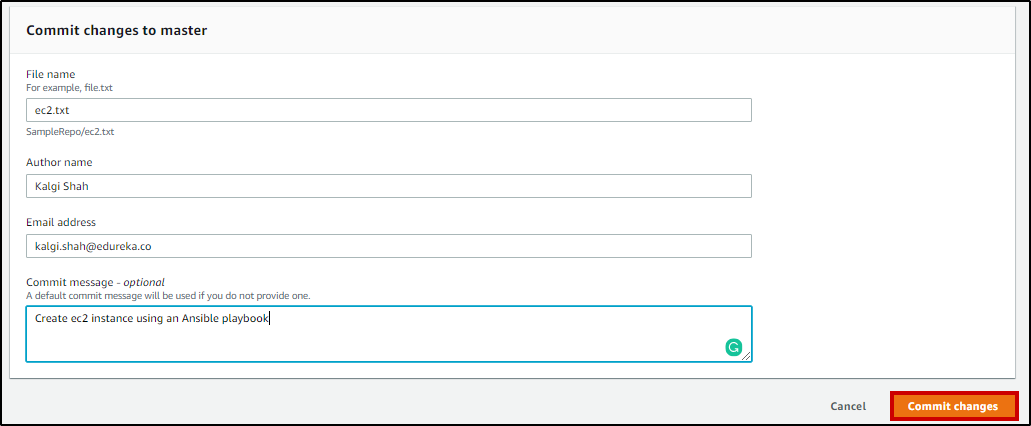
Now that you’ve written your code, you need to commit these changes. Add Filename, Author name, Email ID, Commit message and click on Commit Changes.

Now when you navigate to the Repository section by Clicking on Repository, you should see your repository there.


Go ahead and click on your repository, you should see the file that you just created.
 REGISTER FOR FREE WEBINAR
X
 Thank you for registering
Join Edureka Meetup community for 100+ Free Webinars each month
JOIN MEETUP GROUP