Azure virtual machines (VMs) can be created through the Azure portal.
Sign in to the Azure portal at https://portal.azure.com.
To create a virtual machine:
-
Type virtual machines in the search.
-
Under Services, select Virtual machines.
-
In the Virtual machines page, select Add.
-
In the Basics tab, under Project details, make sure the correct subscription is selected and then choose to Create new resource group. Type myResourceGroup for the name.

-
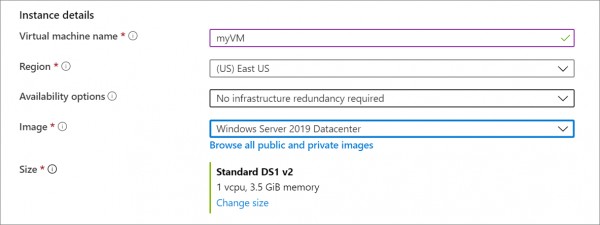
Under Instance details, type myVM for the Virtual machine name and choose East US for your Region, and then choose Windows Server 2019 Datacenter for the Image. Leave the other defaults.

-
Under the Administrator account, provide a username, such as azureuser and a password. The password must be at least 12 characters long and meet the defined complexity requirements.

-
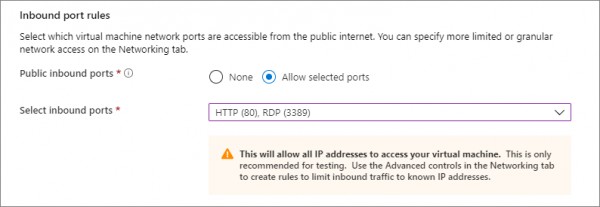
Under Inbound port rules, choose Allow selected ports and then select RDP (3389) and HTTP (80) from the drop-down.

-
Leave the remaining defaults and then select the Review + create button at the bottom of the page.

 REGISTER FOR FREE WEBINAR
X
 Thank you for registering
Join Edureka Meetup community for 100+ Free Webinars each month
JOIN MEETUP GROUP