DevOps Certification Training
- 187k Enrolled Learners
- Weekend/Weekday
- Live Class
Continuous Integration is a development practice where developers integrate code into a shared repository frequently where each integration is verified by an automated build and automated tests. It is the most important part of DevOps that is used to integrate various DevOps stages. In this blog, we will deal with the problems developers face while writing, testing and delivering software to end users and how they solve it using CI.
In this blog, we will focus on the below topics:
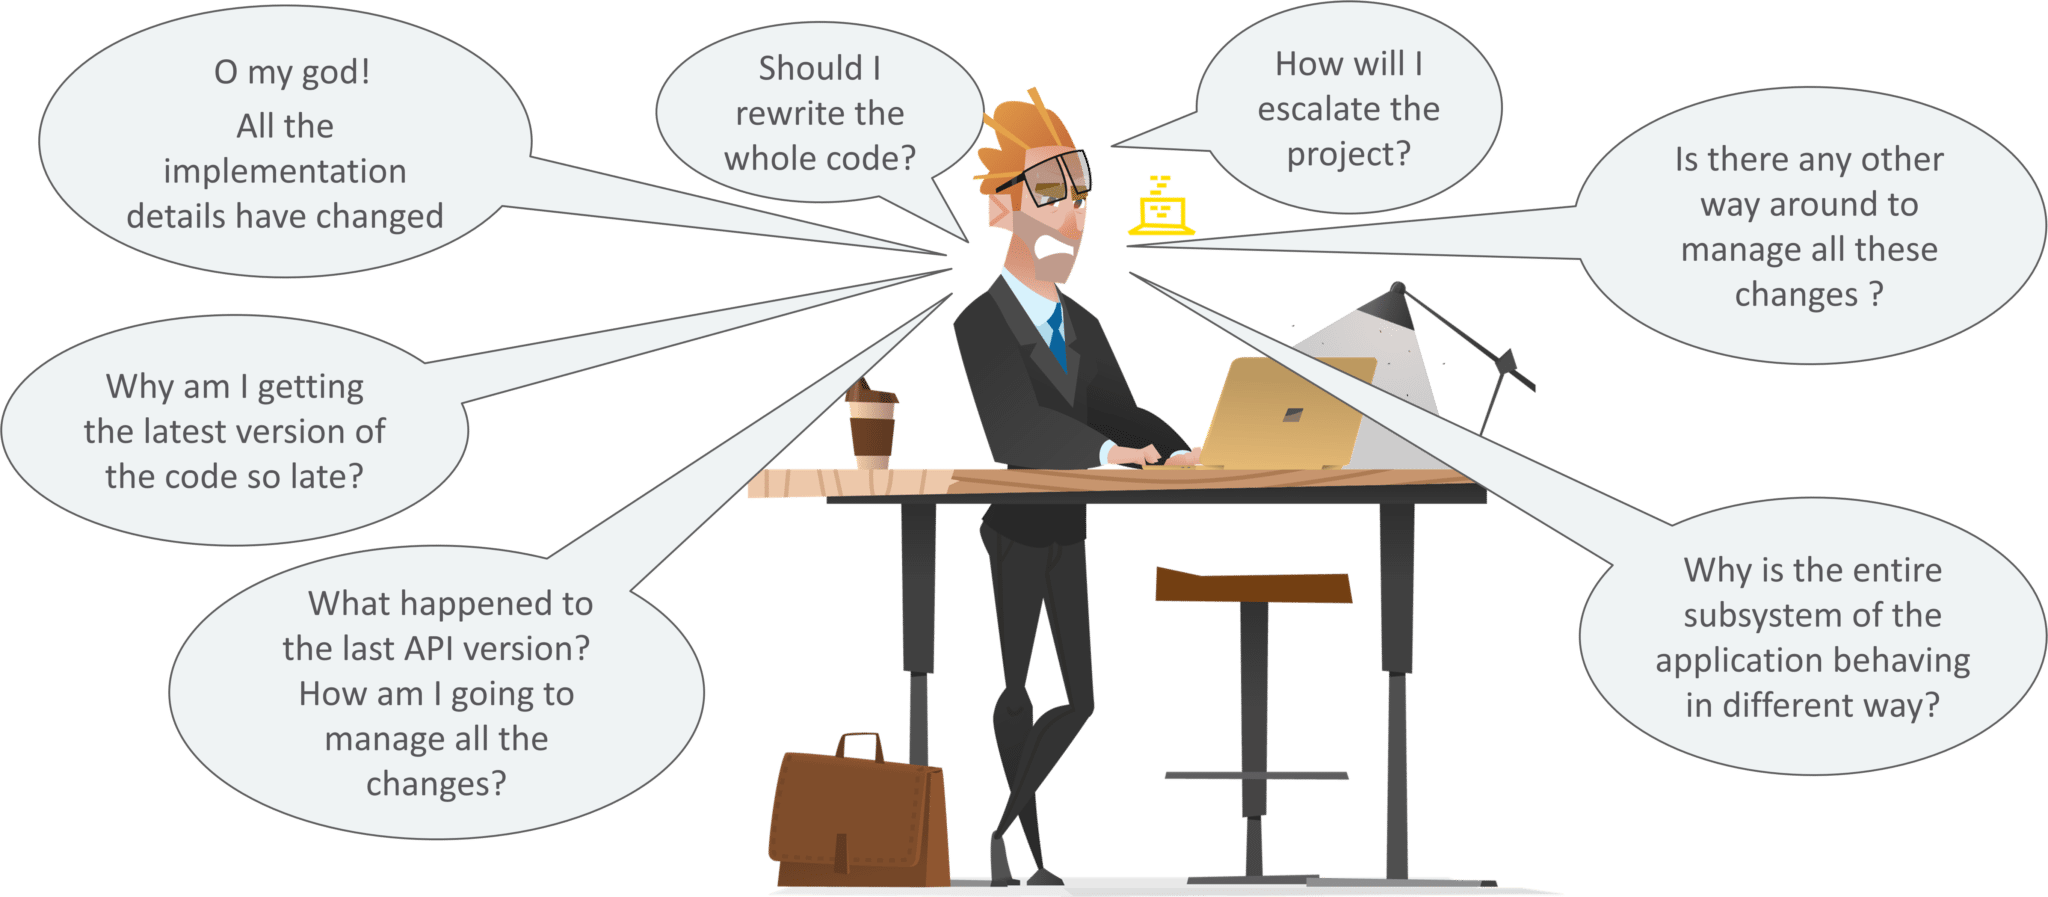
In Traditional Integration or/software development cycle,
The main factors that can make these problems escalate:
So, below are the steps to solve the above problems:
So, let us see what exactly is Continuous Integration?
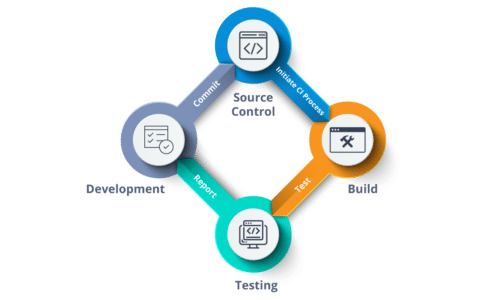 We Will Start with the Martin Fowler’s Definition:
Continuous Integration is a software development practice where members of a team integrate their work frequently, usually, each person integrates at least daily leading to multiple integrations per day. Each integration is verified by an automated build (including test) to detect integration errors as quickly as possible. Many teams find that this approach leads to significantly reduced integration problems and allows a team to develop cohesive software more rapidly.
Automating your build, test and deploy processes can increase the problems commonly happening on projects. So we should have a reliable method of integrating that will ensure that the errors can be found sooner than later.
This Edureka video on Continuous Integration explains the concept of Continuous Integration, its benefits and its Tools (Jenkins).
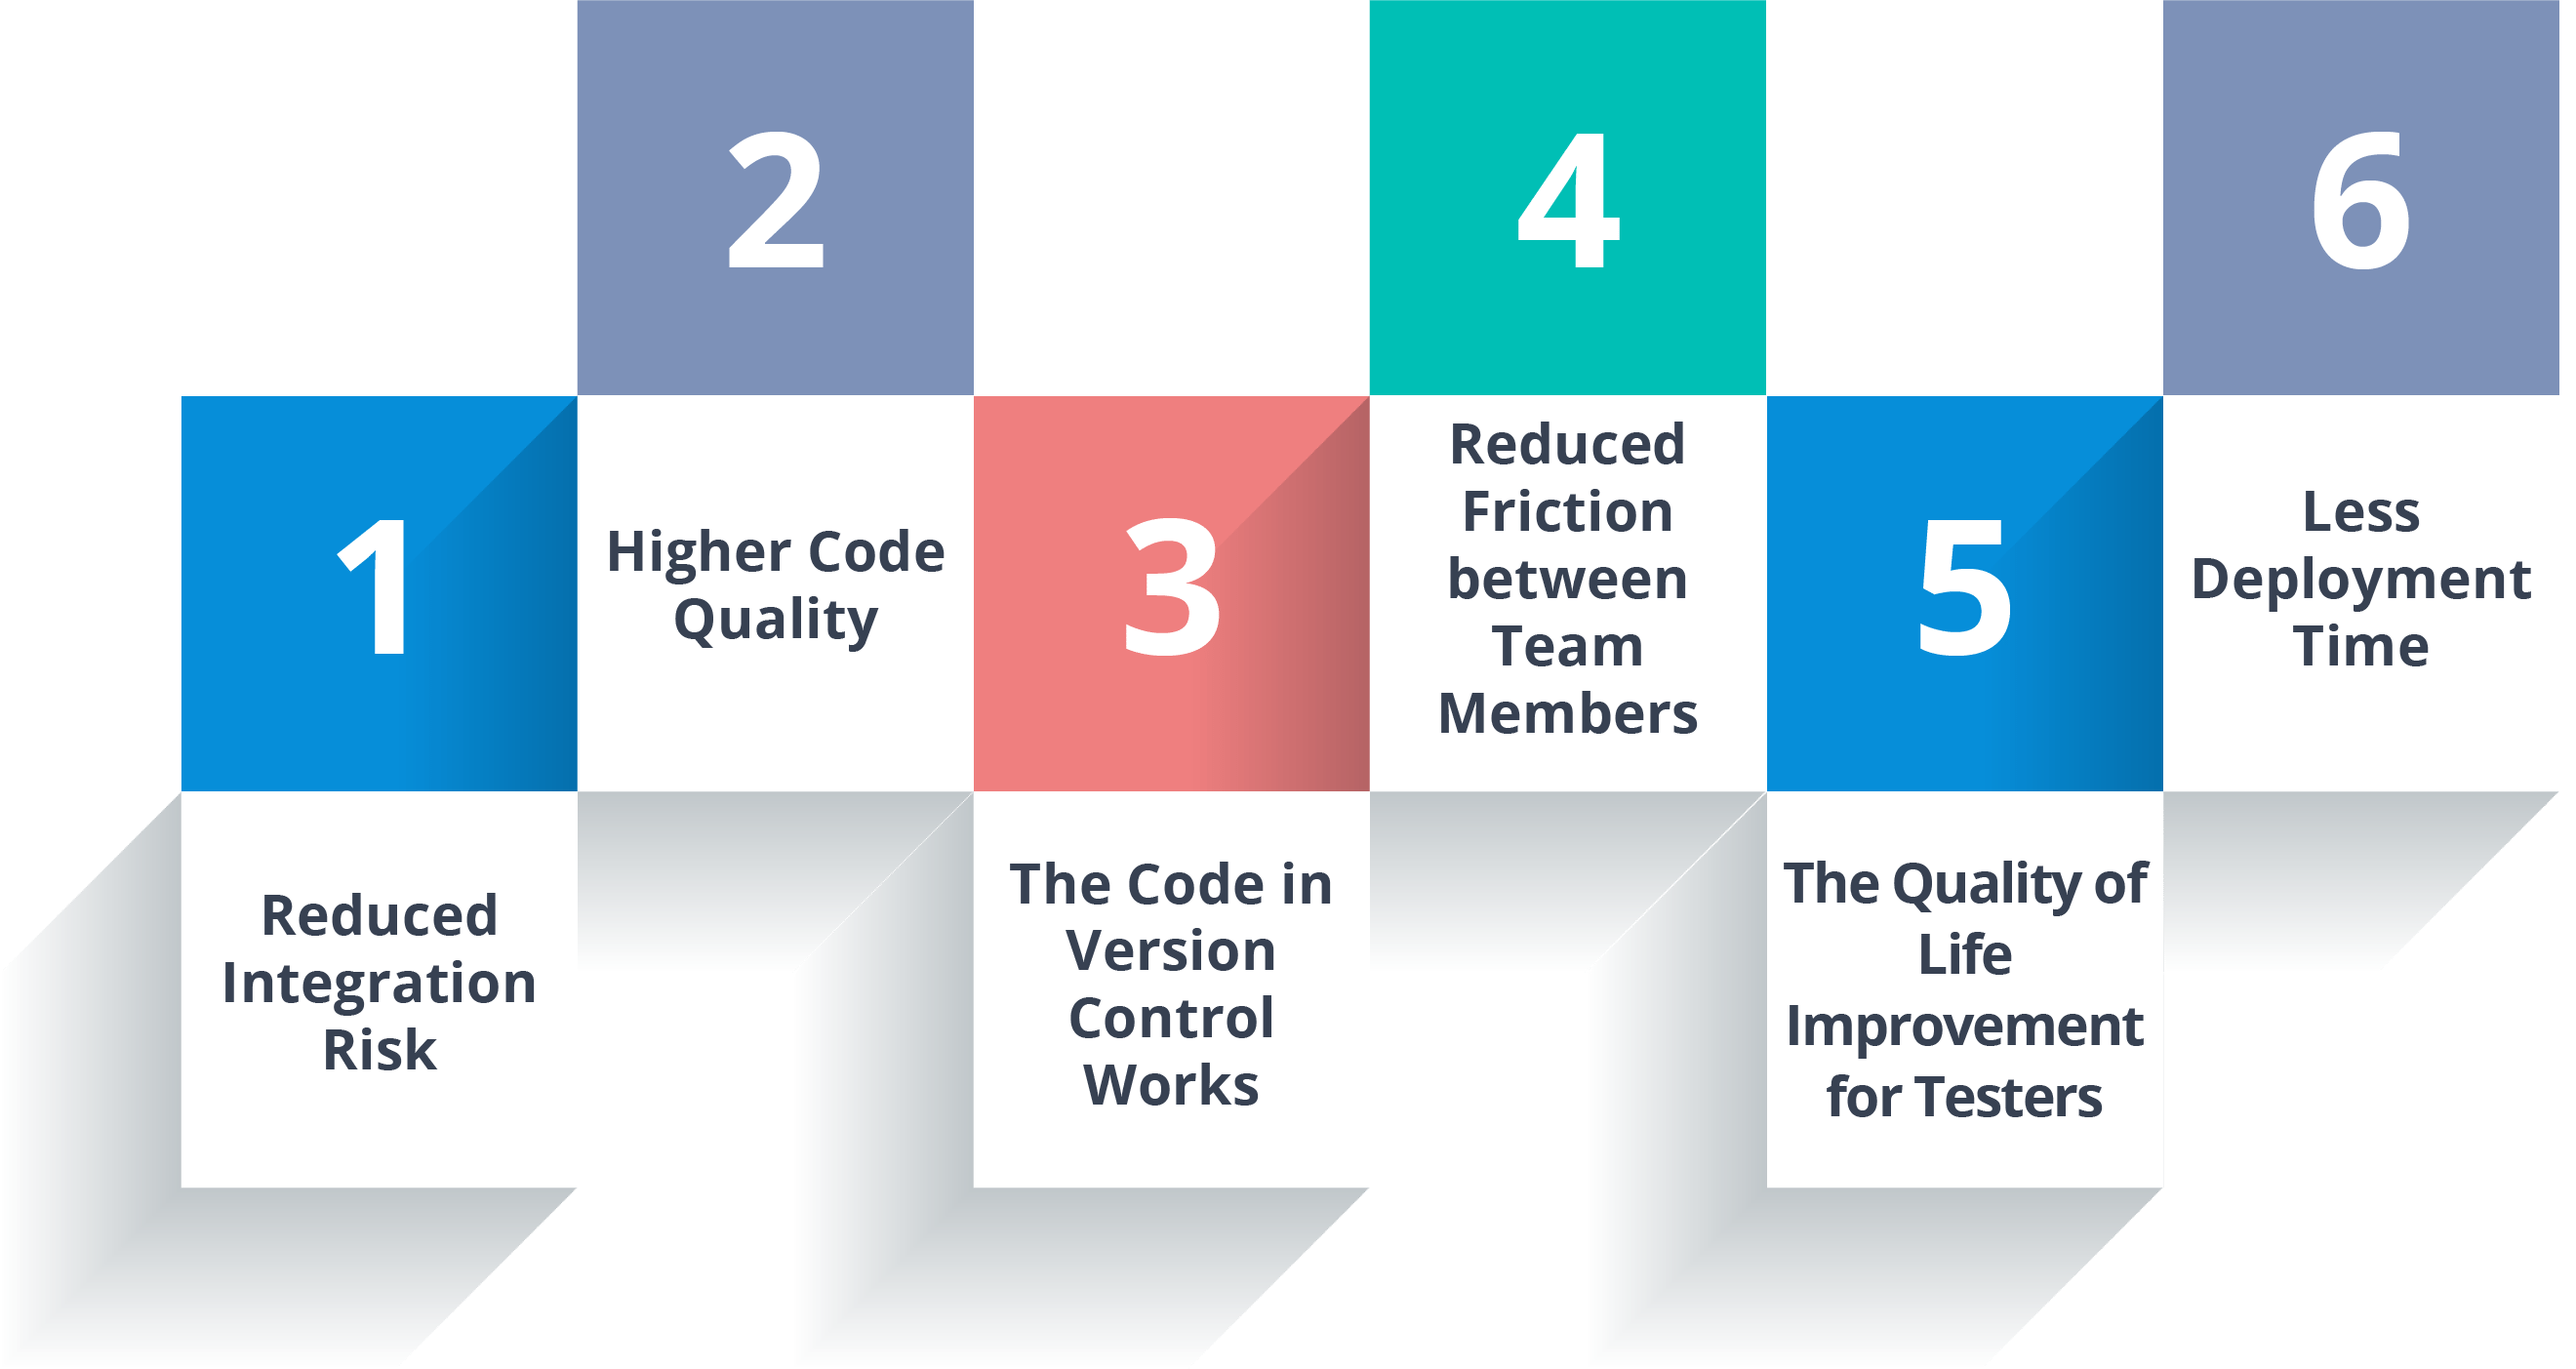
Let’s move on and see what are the benefits of Continuous Integration.
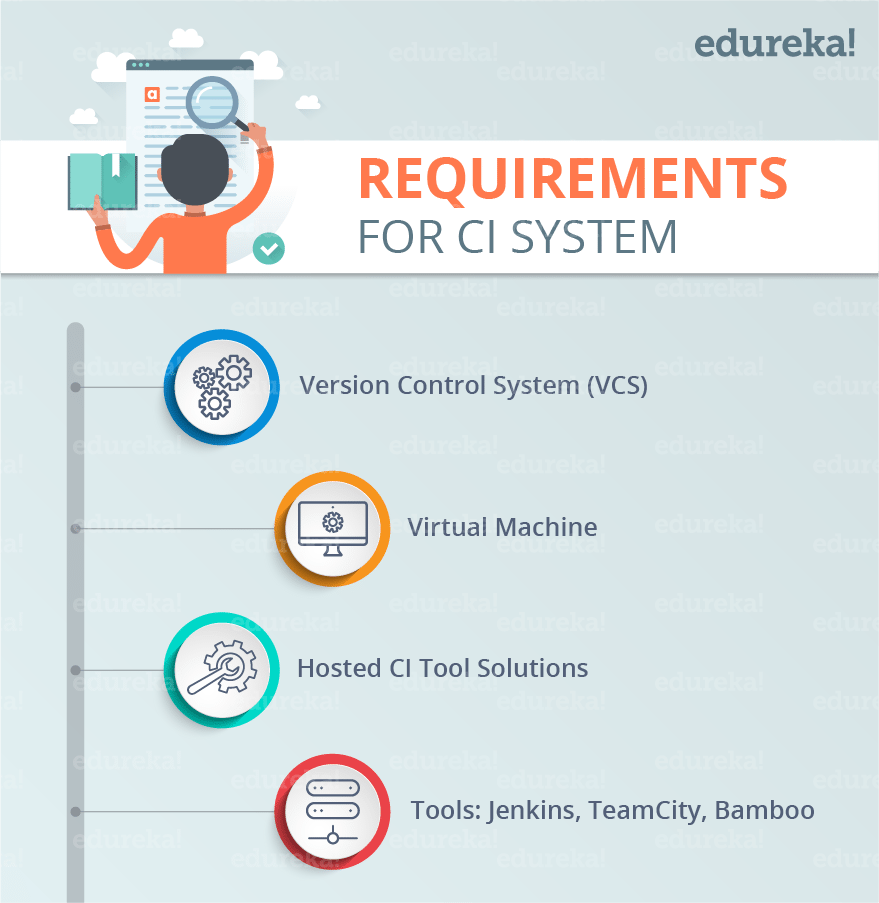 But you might be wondering what are the requirements for the installing of the CI system for your needs. If you want to install CI server in your own environment, you’ll need a few things first.
Jenkins is an open source automation tool written in Java with plugins built for Continuous Integration purpose. Jenkins is used to build and test your software projects continuously making it easier for developers to integrate changes to the project, and making it easier for users to obtain a fresh build. It also allows you to continuously deliver your software by integrating with a large number of testing and deployment technologies.
With Jenkins, organizations can accelerate the software development process through automation. Jenkins integrates development life-cycle processes of all kinds, including build, document, test, package, stage, deploy, static analysis and much more.
Jenkins achieves Continuous Integration with the help of plugins. Plugins allow the integration of Various DevOps stages. If you want to integrate a particular tool, you need to install the plugins for that tool. For example Git, Maven 2 project, Amazon EC2, HTML publisher etc.
The image below depicts that Jenkins is integrating various DevOps stages:
A company named Sanders & Fresco Private Ltd. got the project from a client which consisted of 4 modules. The Project manager divided these modules between two developers. Now to maintain the consistency in the flow of the project, they built a Continuous Delivery Pipeline where they executed all the modules in terms of jobs (a single job will have two modules). After building those jobs, they synced it in a pipeline. They also checked the build at regular intervals of time while they were developing their project. So, the path of the project which was in git hub repository was provided through Jenkins. Using the concept of CI, they built their project after a fixed interval of time which can be defined by build trigger option in Jenkins.
So, let us see how we can do this using Jenkins.
Step 1: Open the Jenkins on your designated port number in your VM.
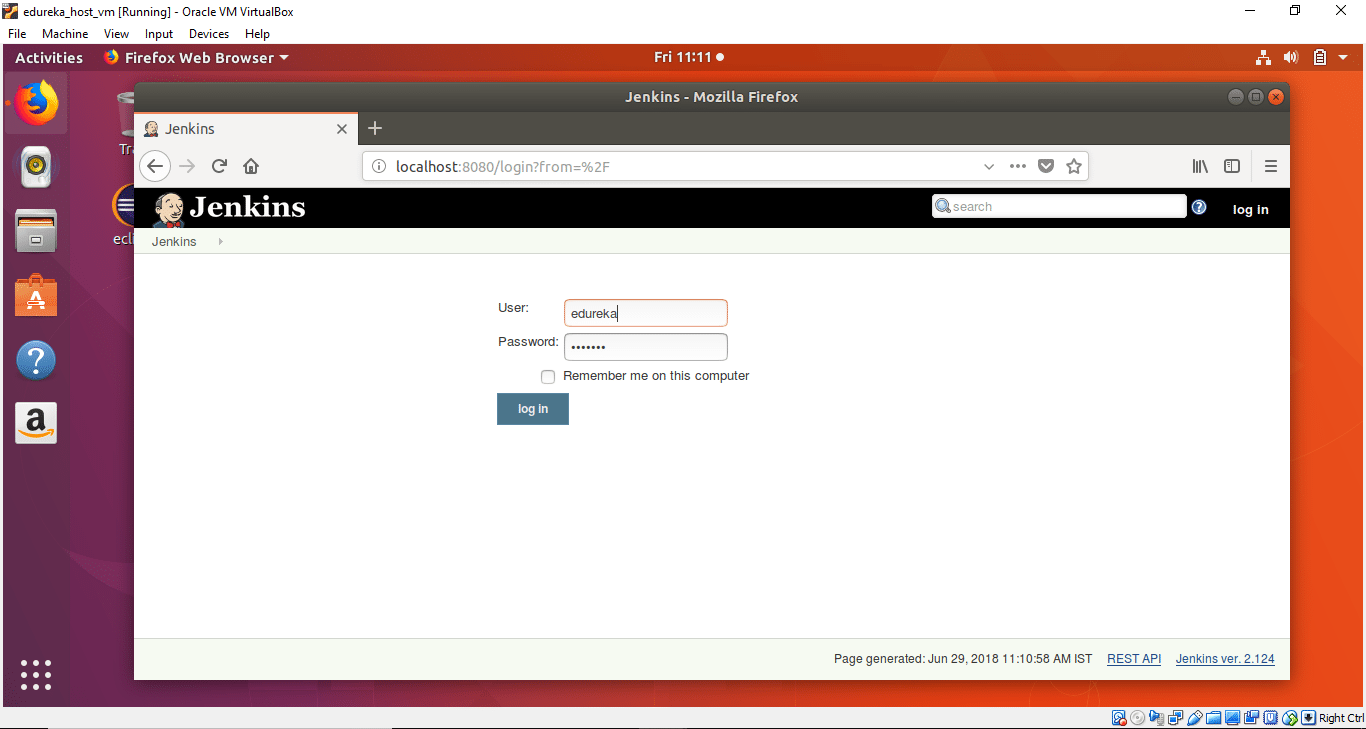
Step 2: Click on New Item to create a new Job.
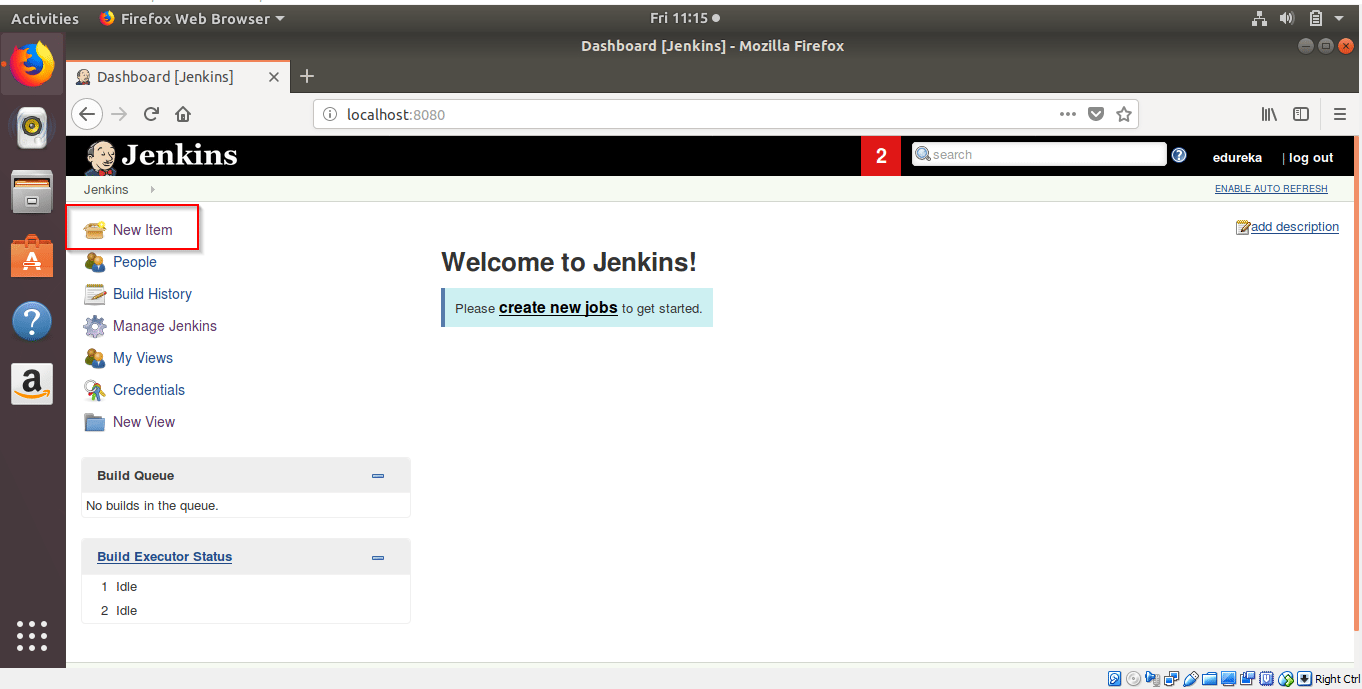
Step 3: Give the name of Freestyle Project. Here I have given Job1.
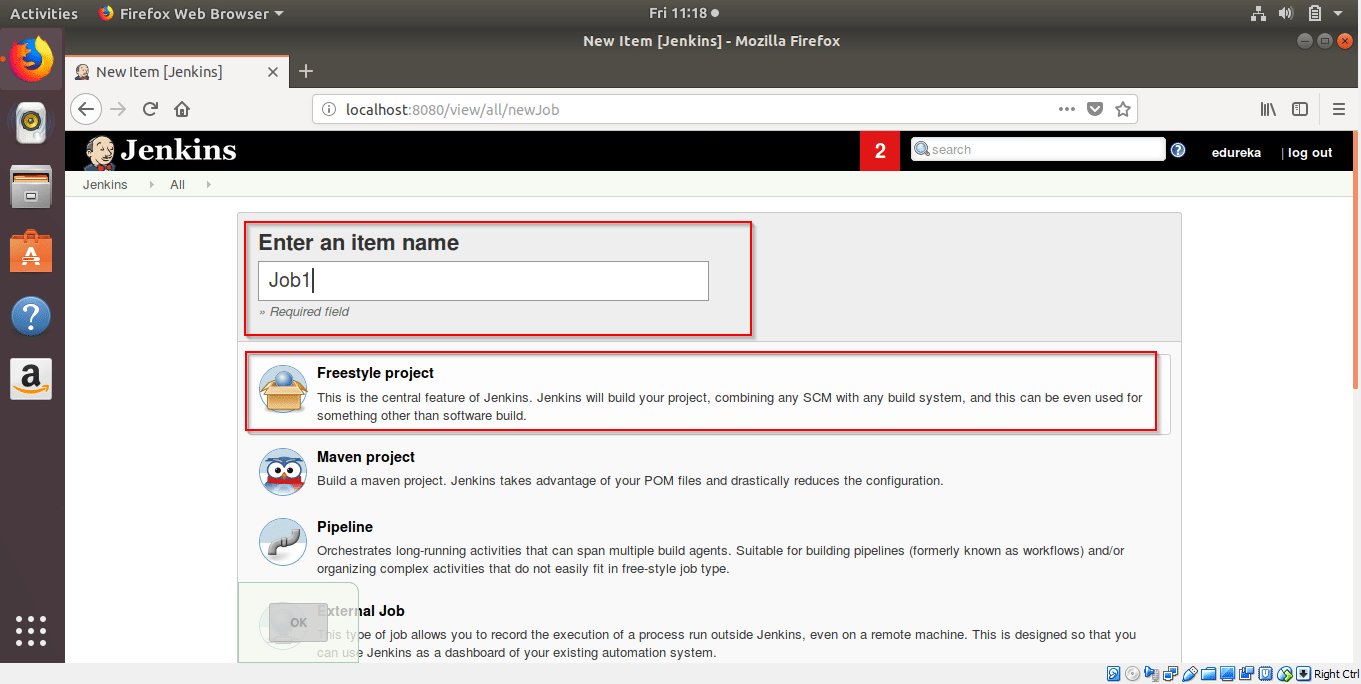
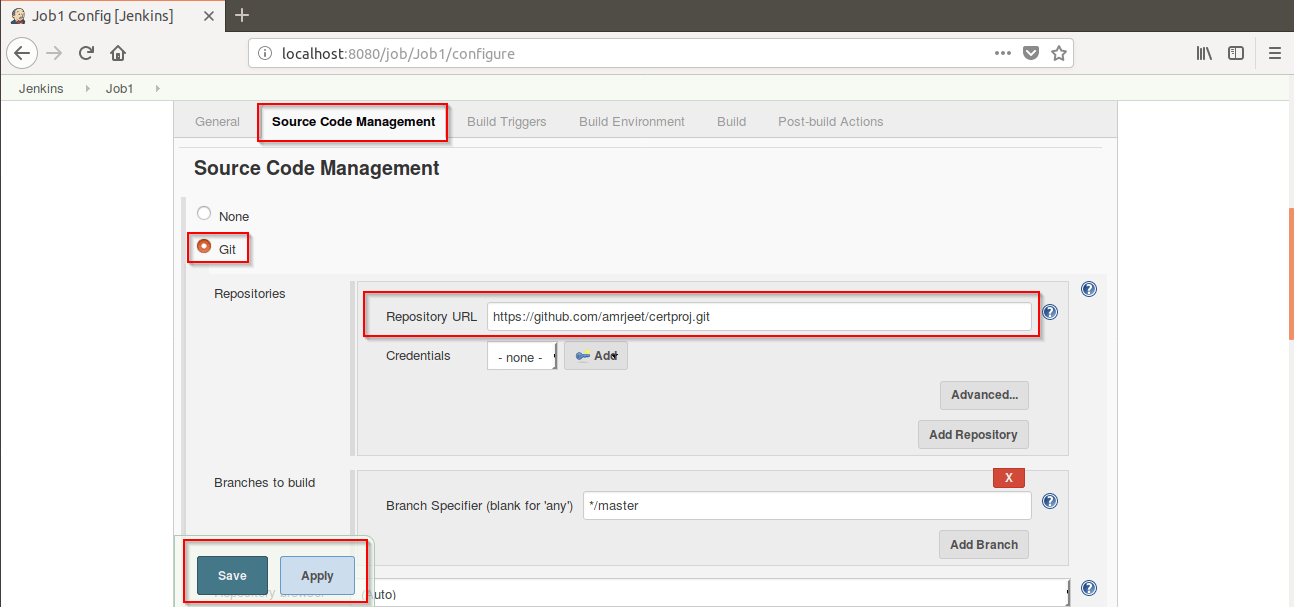
Step 4: Now go to Source Code Management-> Git. Fill the project path to pull the project from Git and Click on Apply.
Step 5: Click on Build Now.
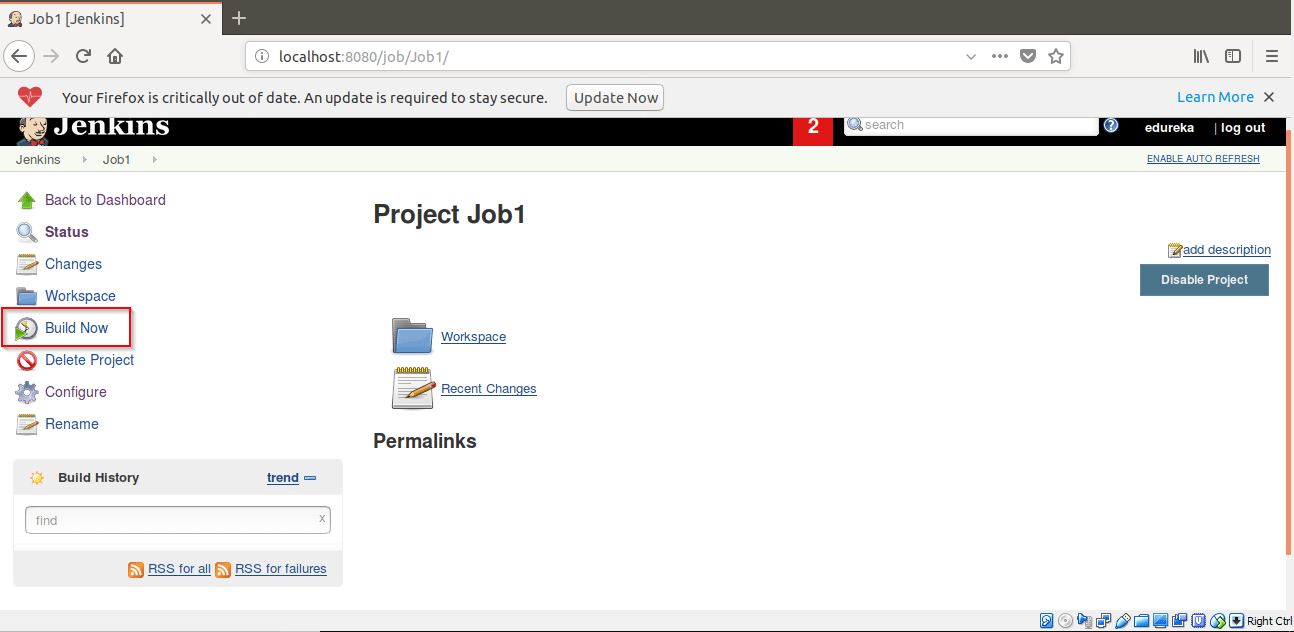
Step 6: The Job1 will start building it.
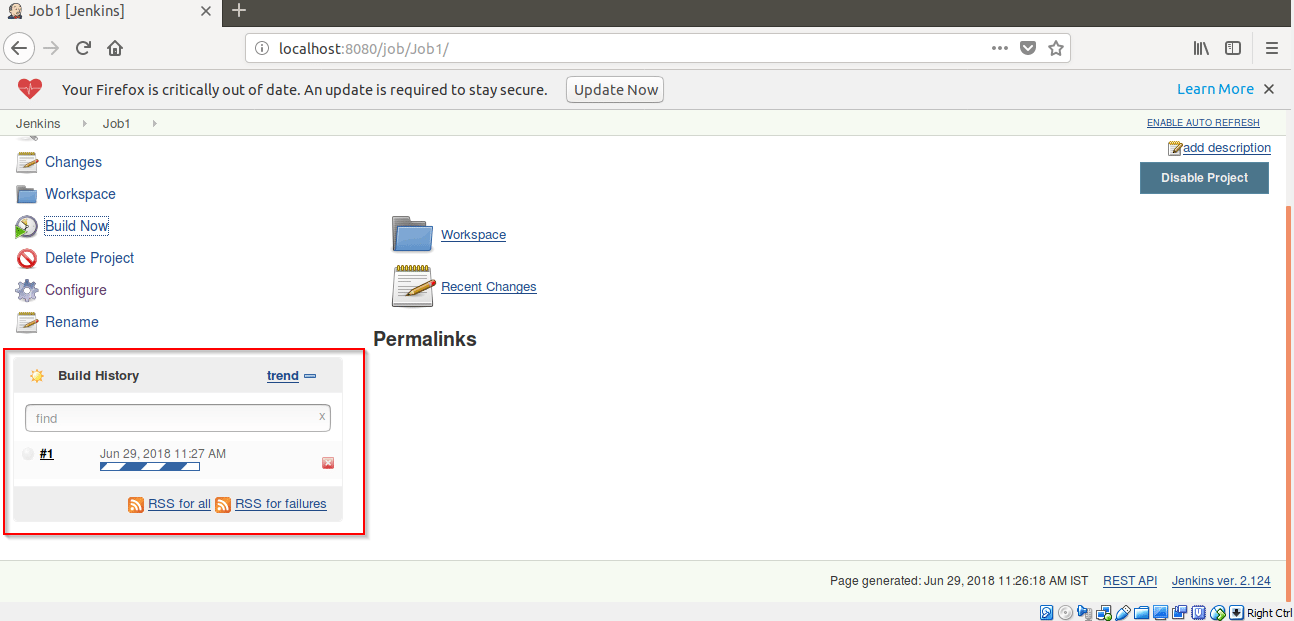
Now we will create a project/Job2 which will build after a fixed interval of time (i.e. after every minute) which we can define by using Poll SCM.
Step 7: Click on New Item to create a new Job.
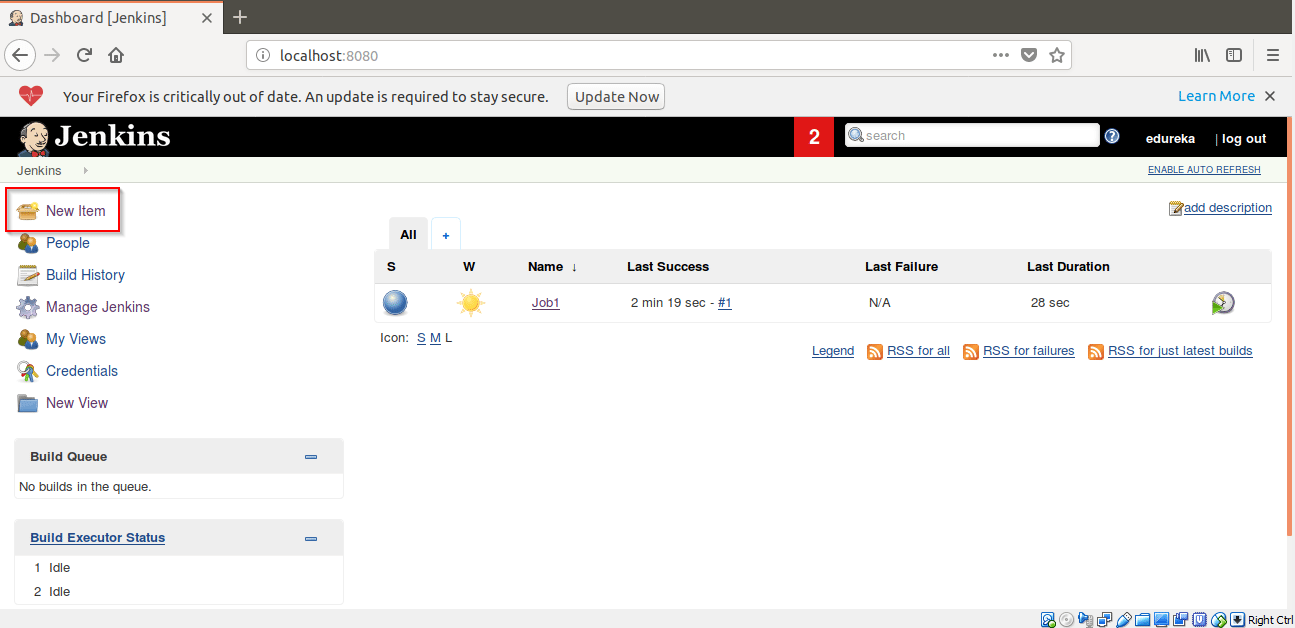
Step 8: Give the name of Freestyle Project. Here I have given Job2.
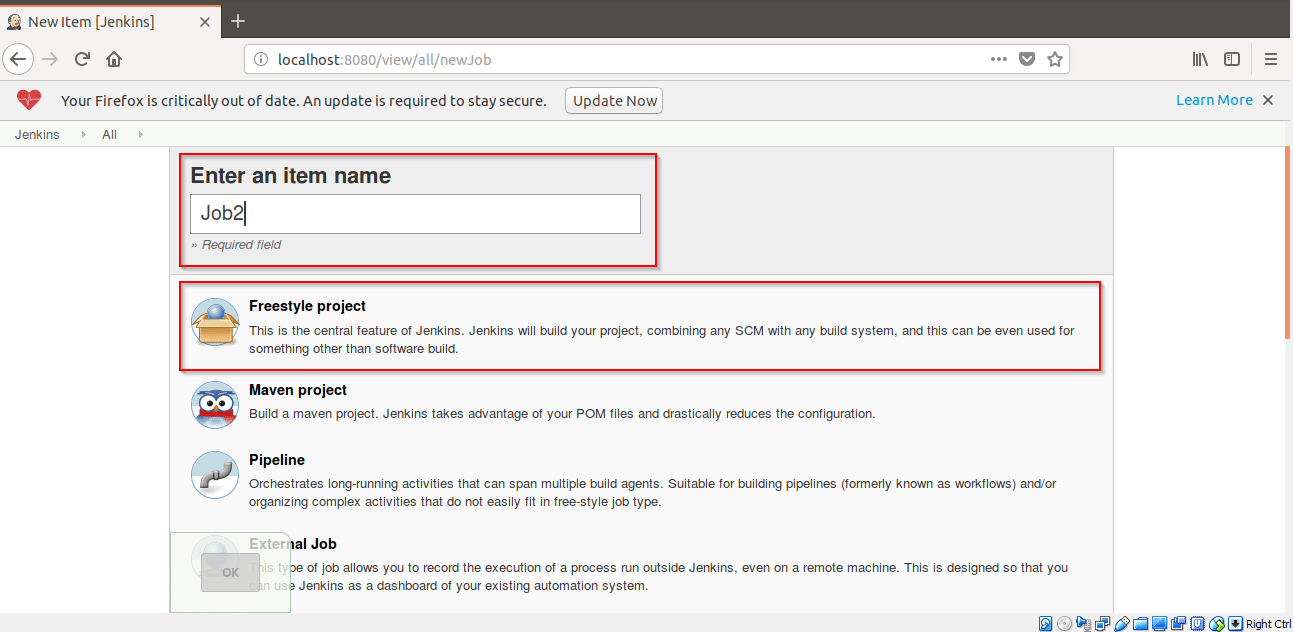
Step 9: Now go to Source Code Management-> Git. Fill the project path to pull the project from Git and Click on Apply.
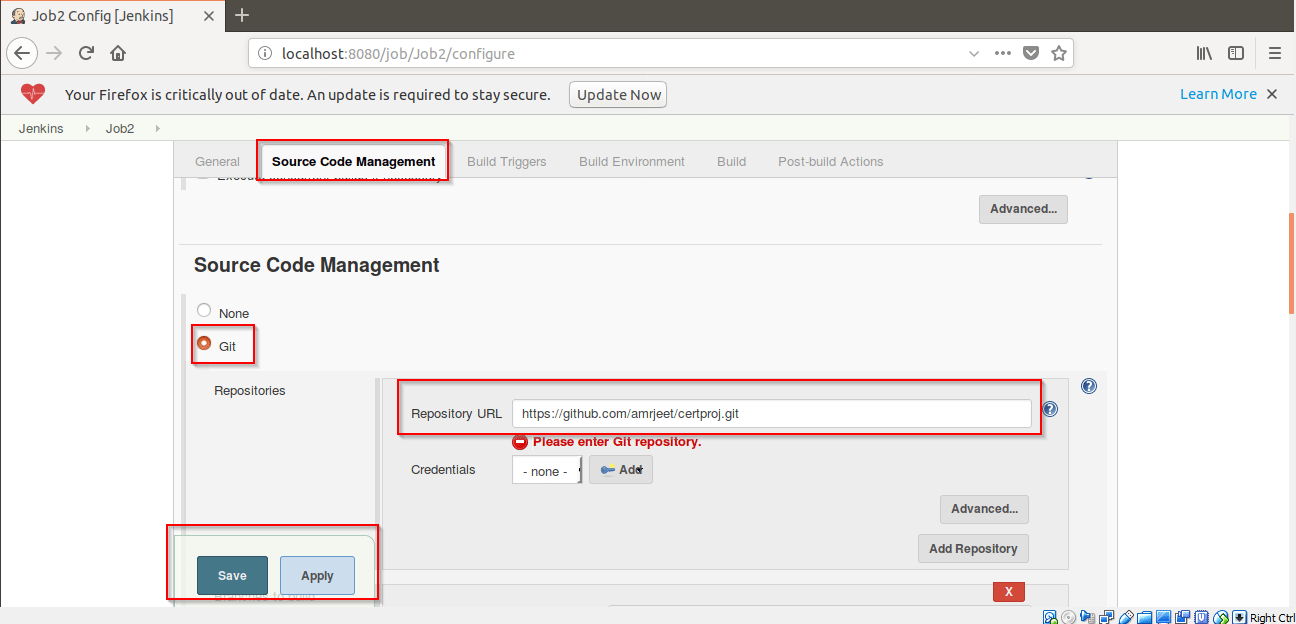
Step 10: Then go to Build Trigger -> Poll SCM. Enter ” * * * * * ” to build the Job2 after every minute and click on Apply.
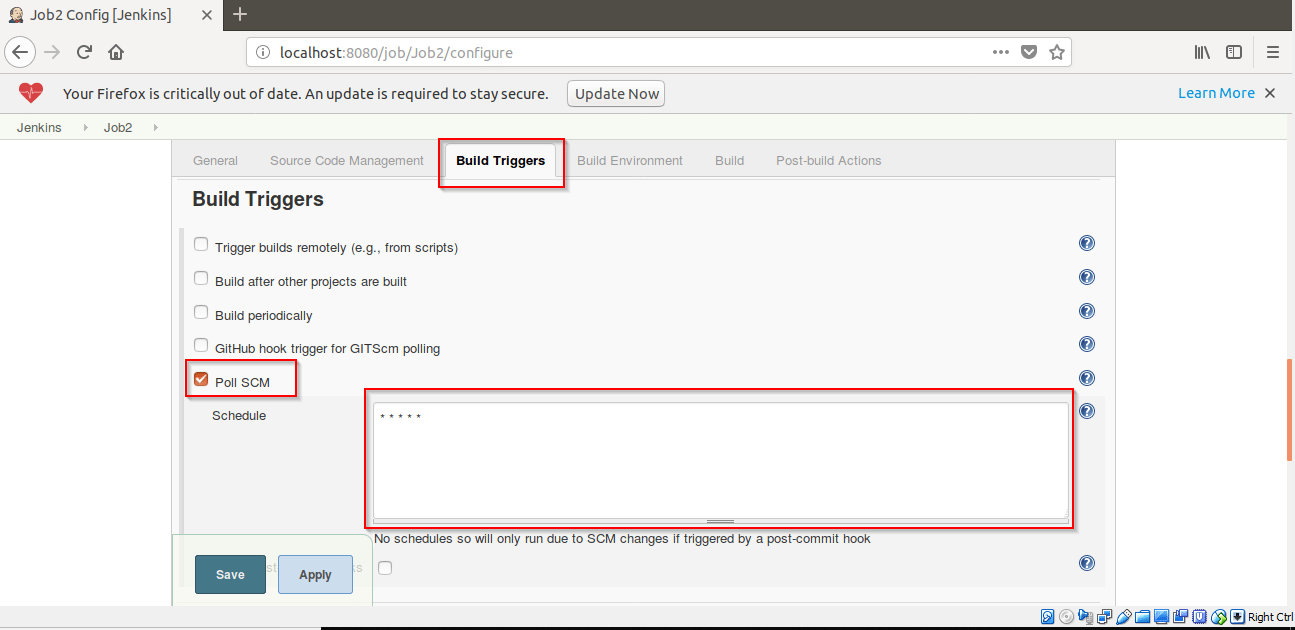
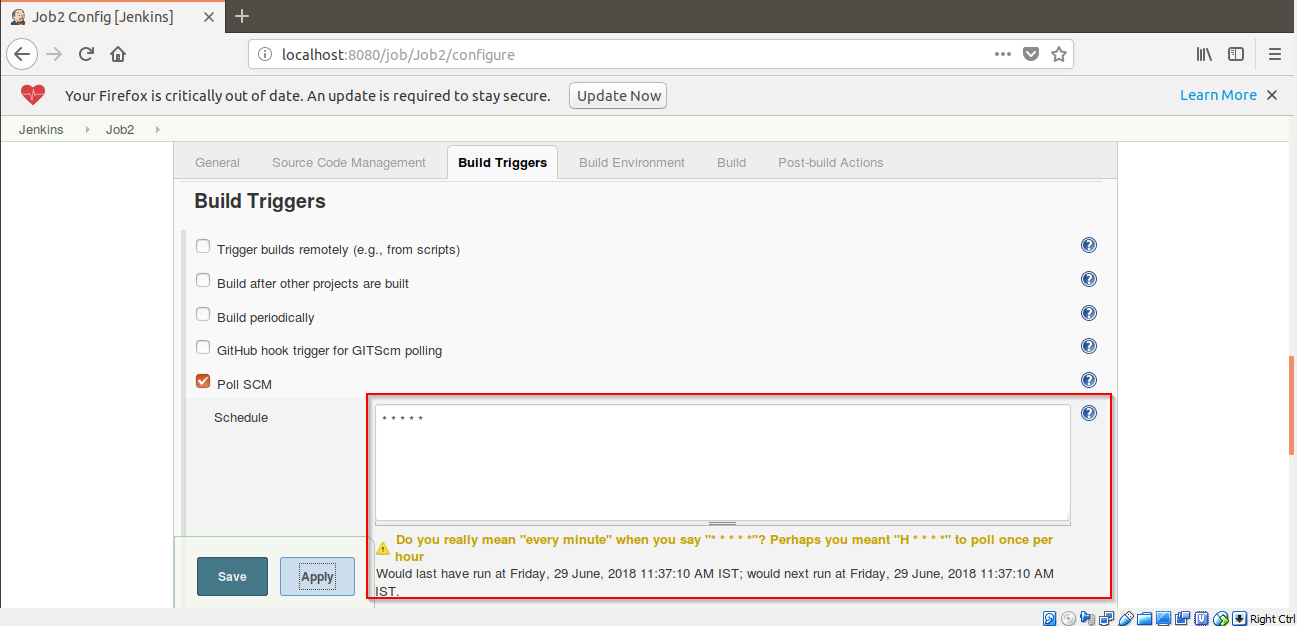
After clicking on Apply, a message will be displayed. Click on Save button.
Step 11: Click on Build Now.
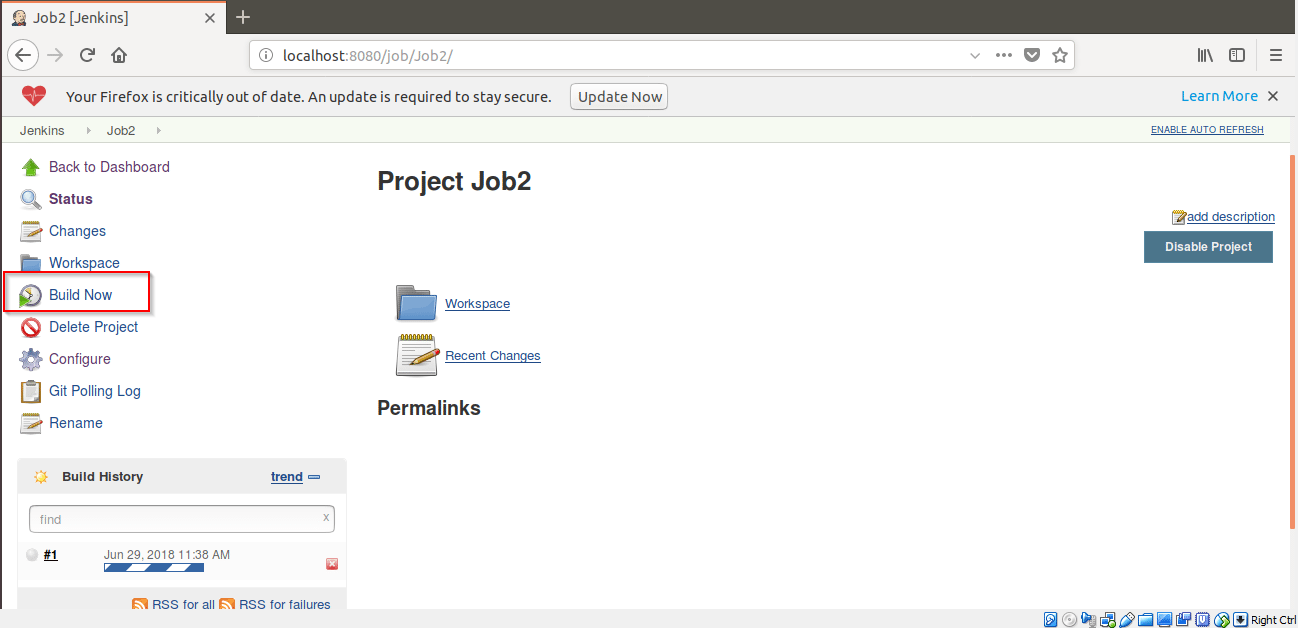
Step 12: The Job2 will start building after every minute.
Note: To check for build status, Click on Git Polling Log. This will show details of Job2 i.e. the time at which it got built.
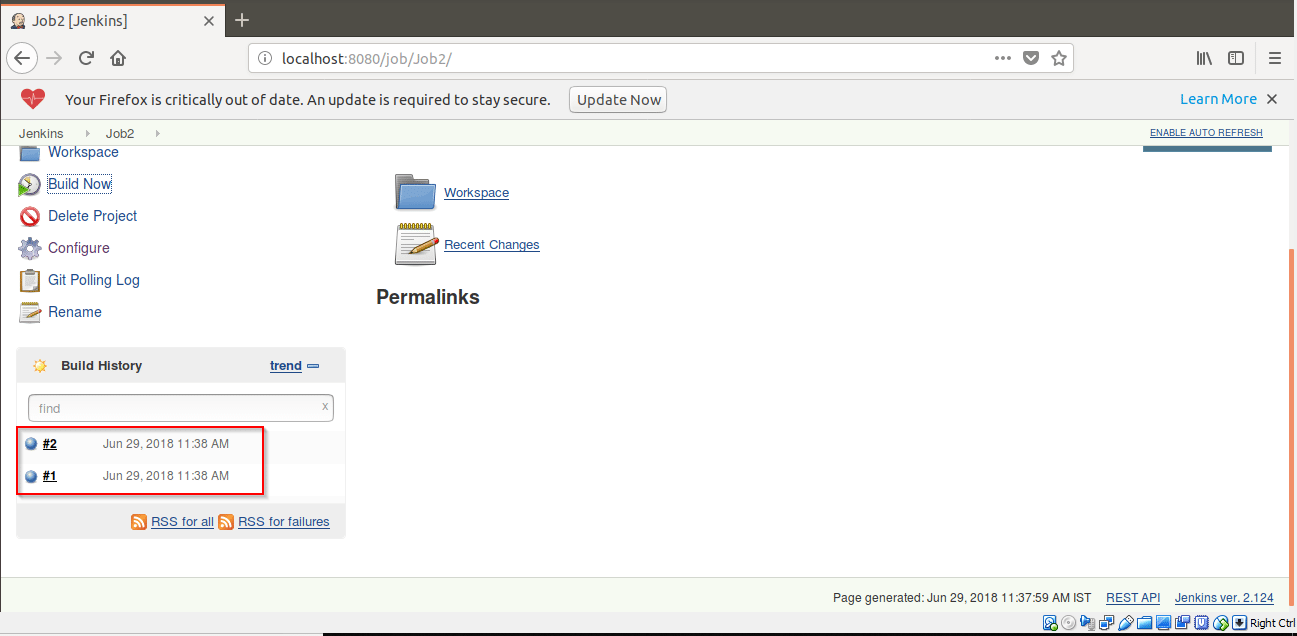
Now, we will be building a Jenkins Pipeline to show Continuous Delivery.
Step 13: Now go to Jenkins homepage by clicking on Jenkins.
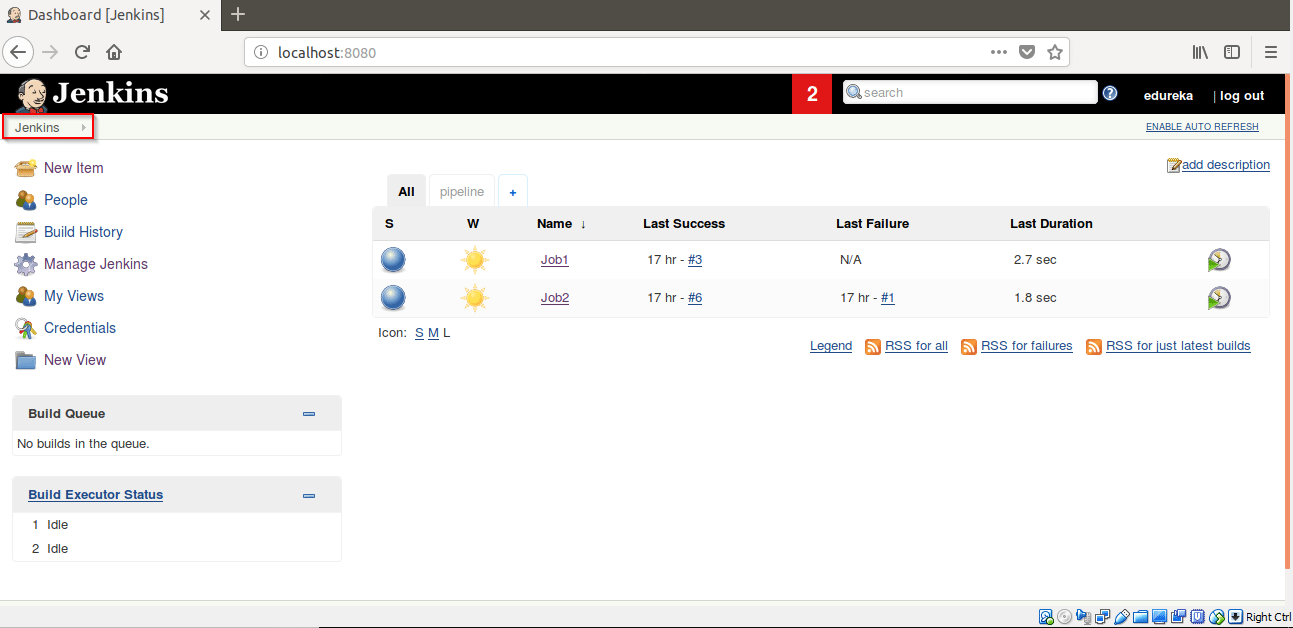
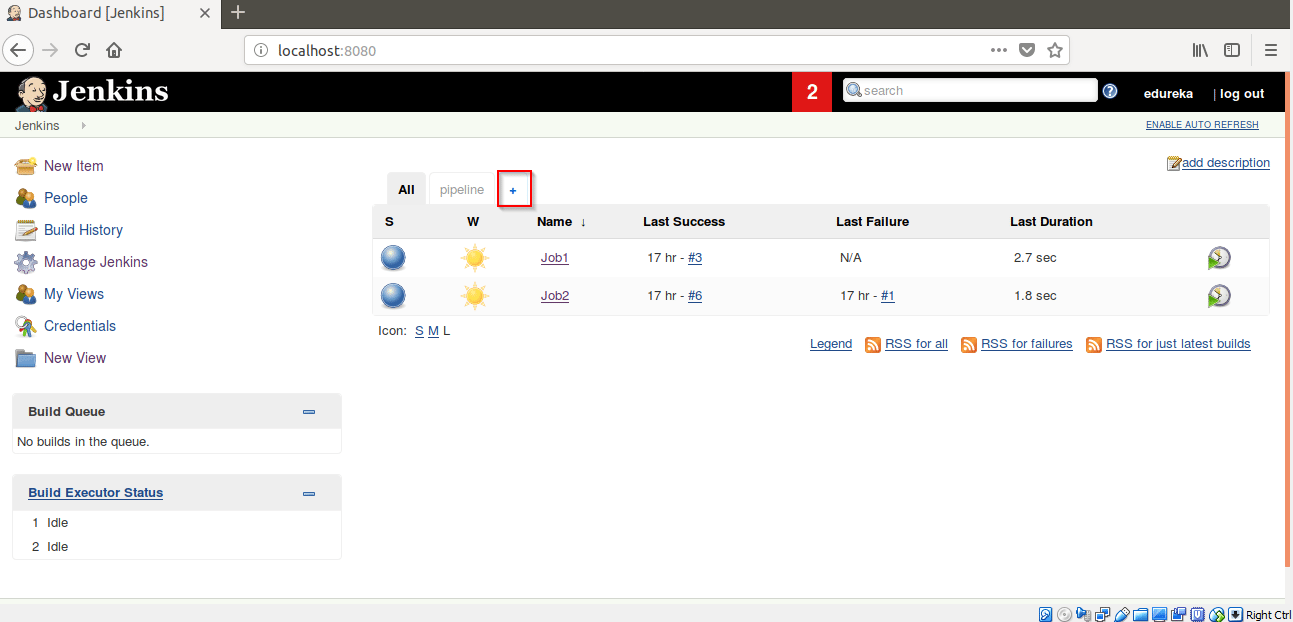
Step 14: Click on “+” to create a pipeline view.
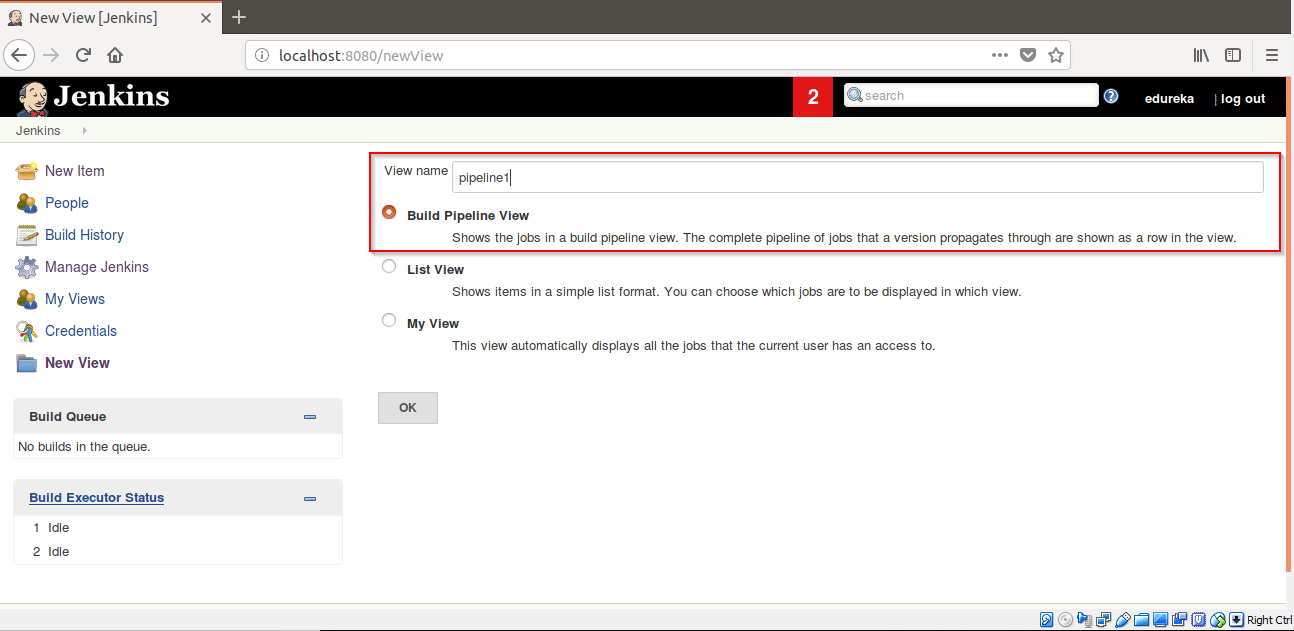
Step 15: Name the view and check mark “Build Pipeline View” and Click on OK.
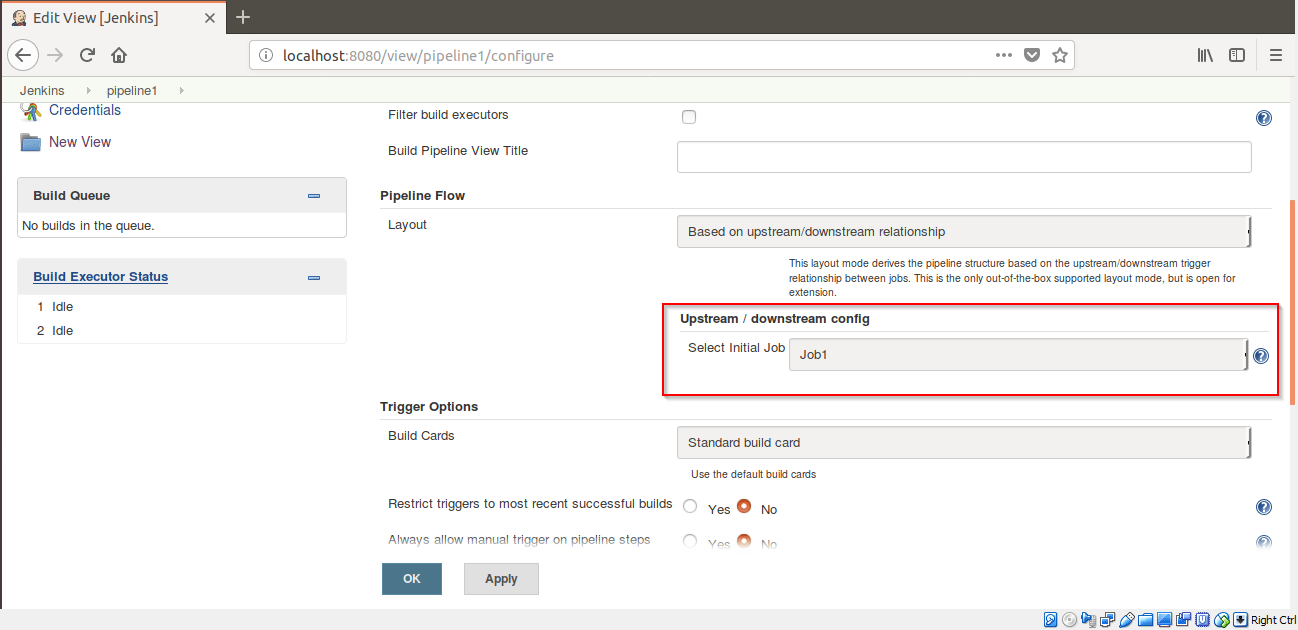
Step 16: Go to Pipeline Flow and add Job1 in Select Initial Job. Click on OK.
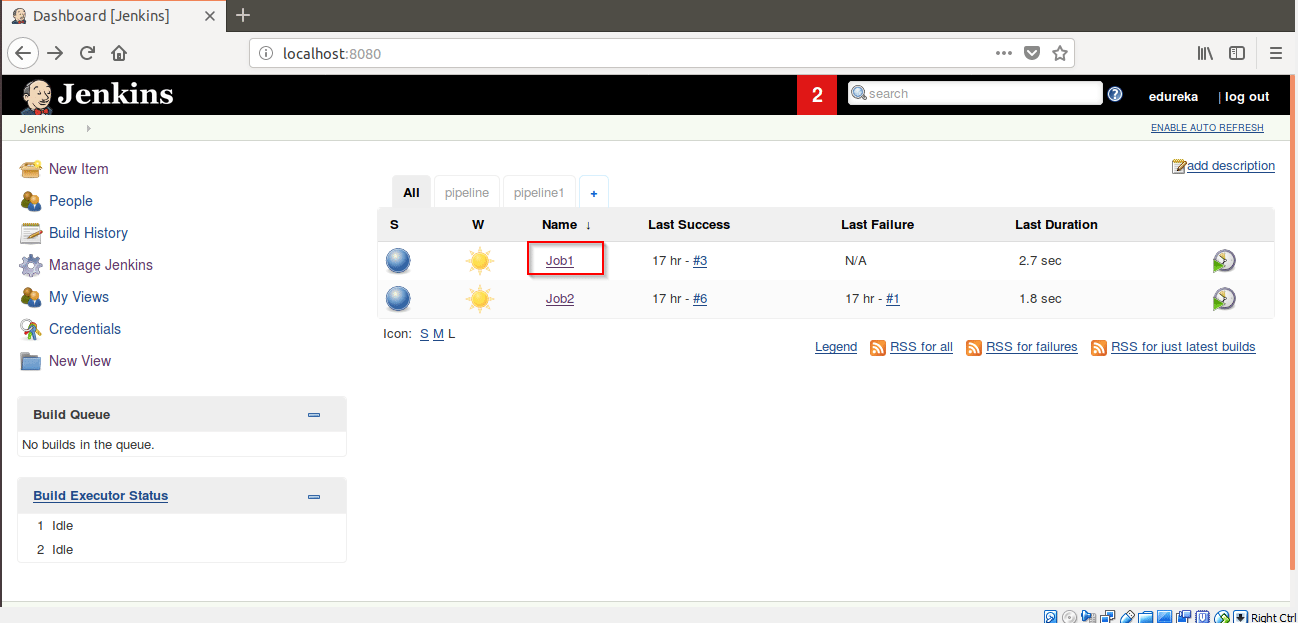
Step 17: Now Click on Job1.
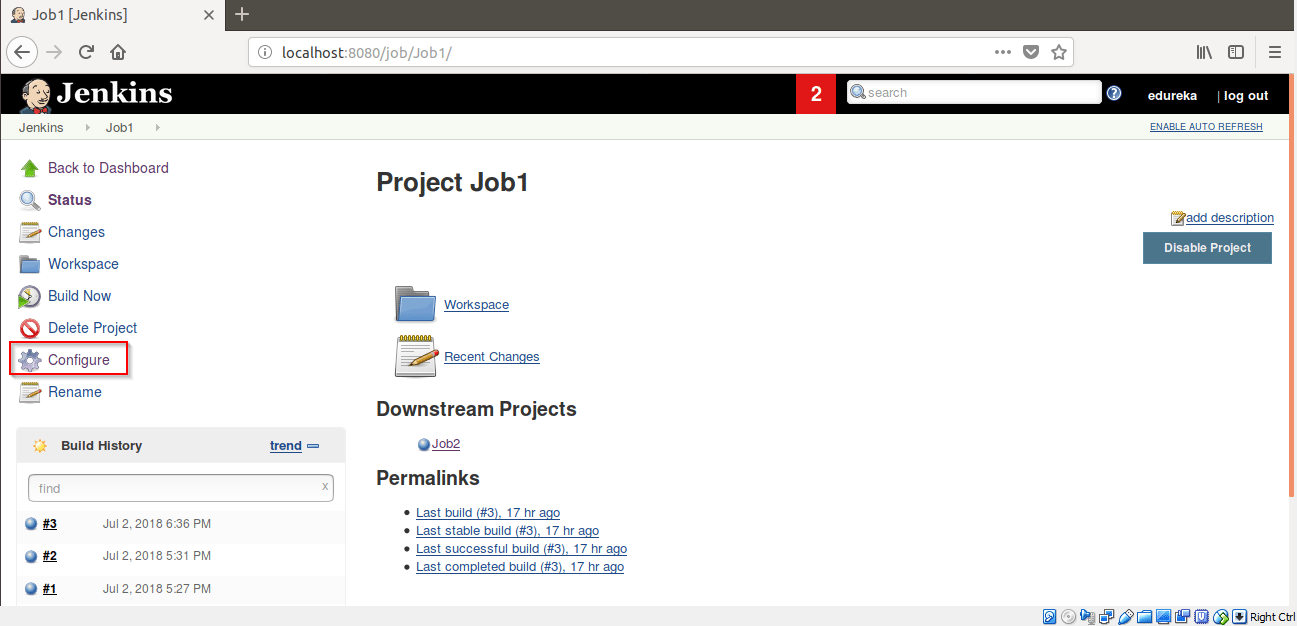
Step 18: Then Click on Configure.
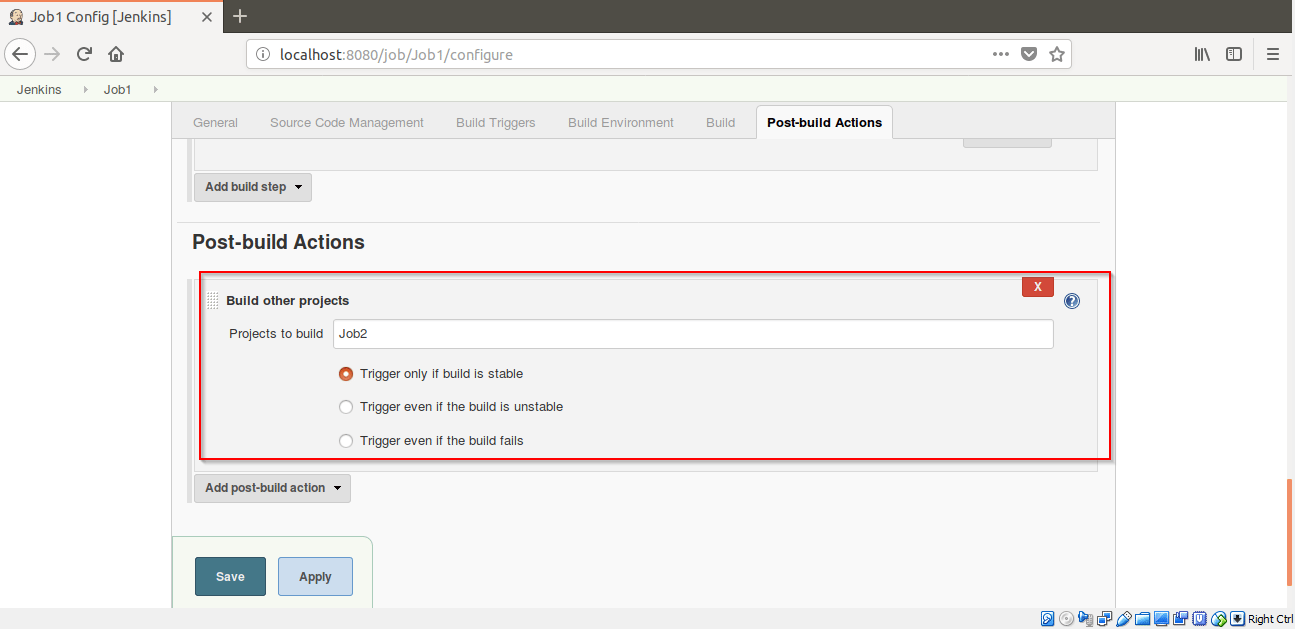
Step 19: Go to Post-build Actions and select Build other projects. Add Job2 in Projects to build and check mark the “Trigger only if the build is stable“. Click on Save.
Step 20: Now Click on Job2 and click on Configure.
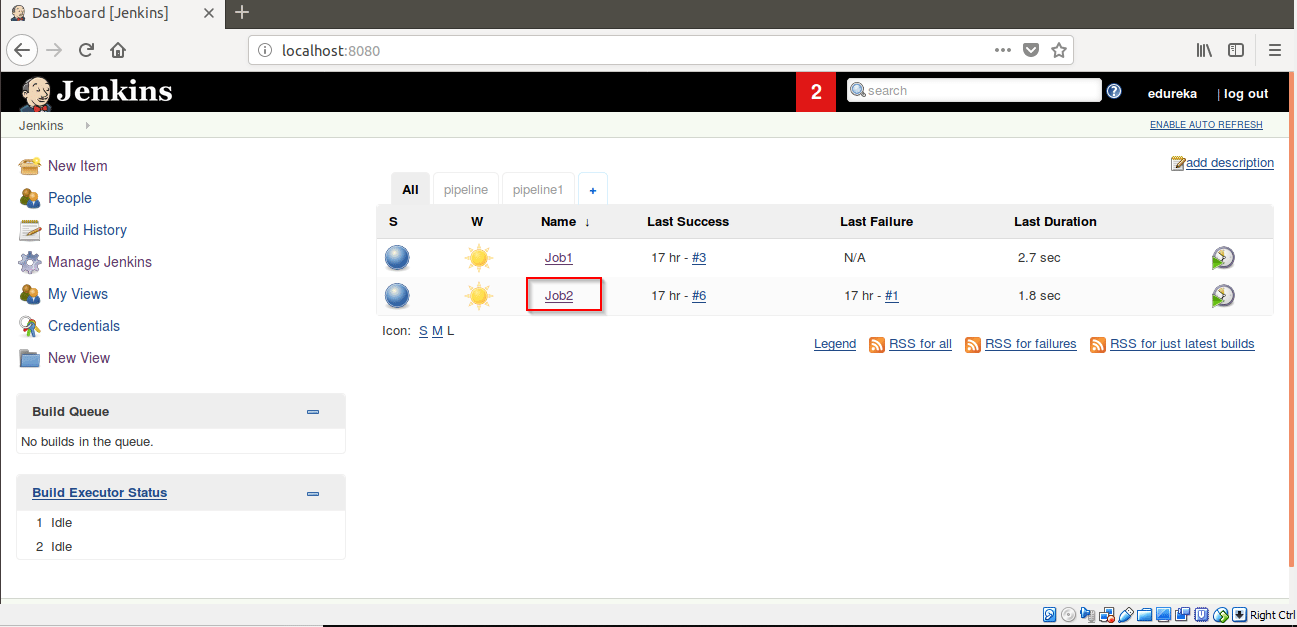
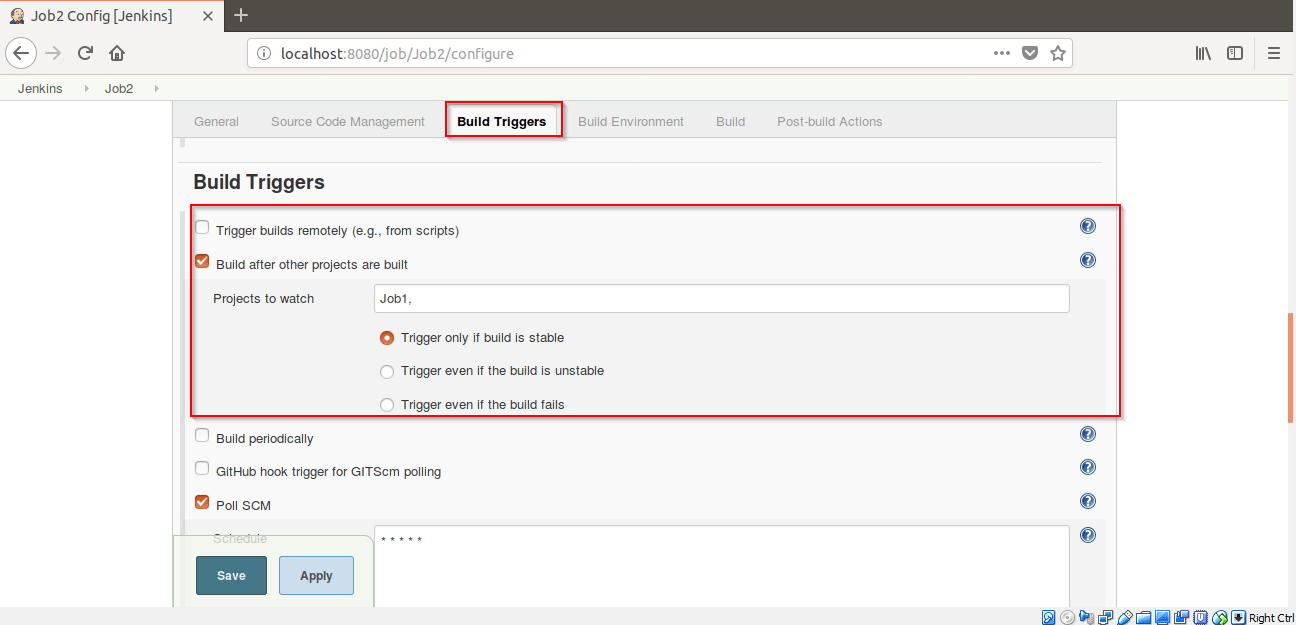
Step 21: Go to Build Triggers -> Select Build after other projects are built. Add Job1 in Projects to watch label.
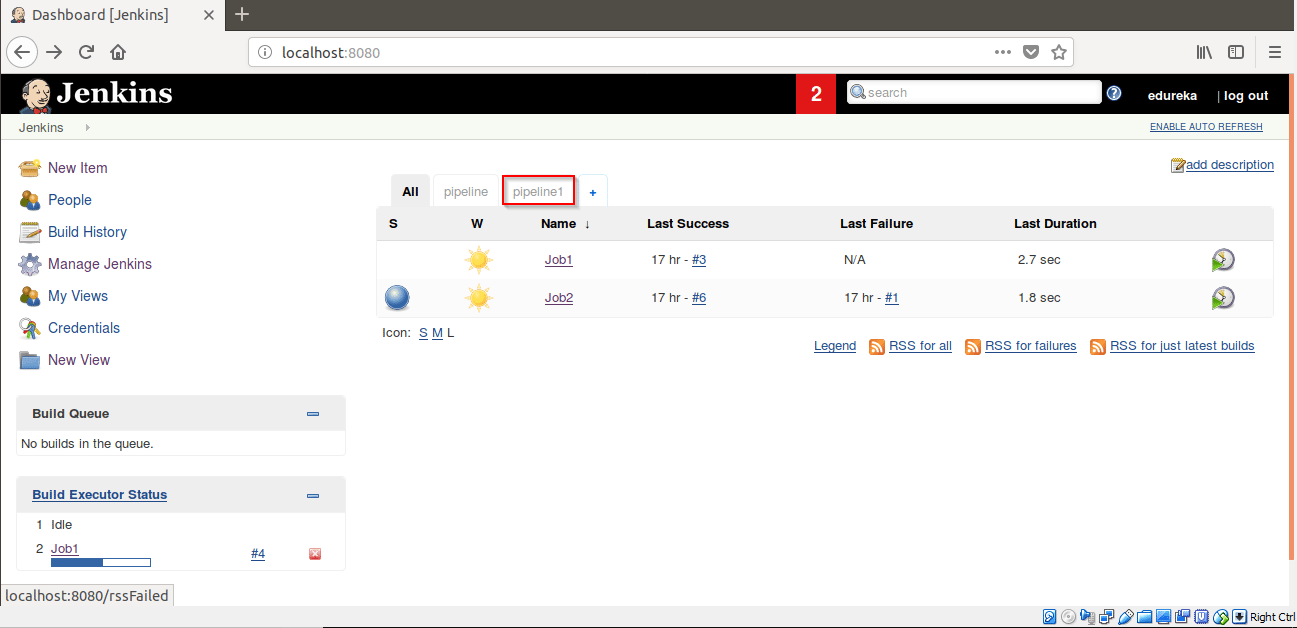
Step 22: Click on the pipeline1 view you created.
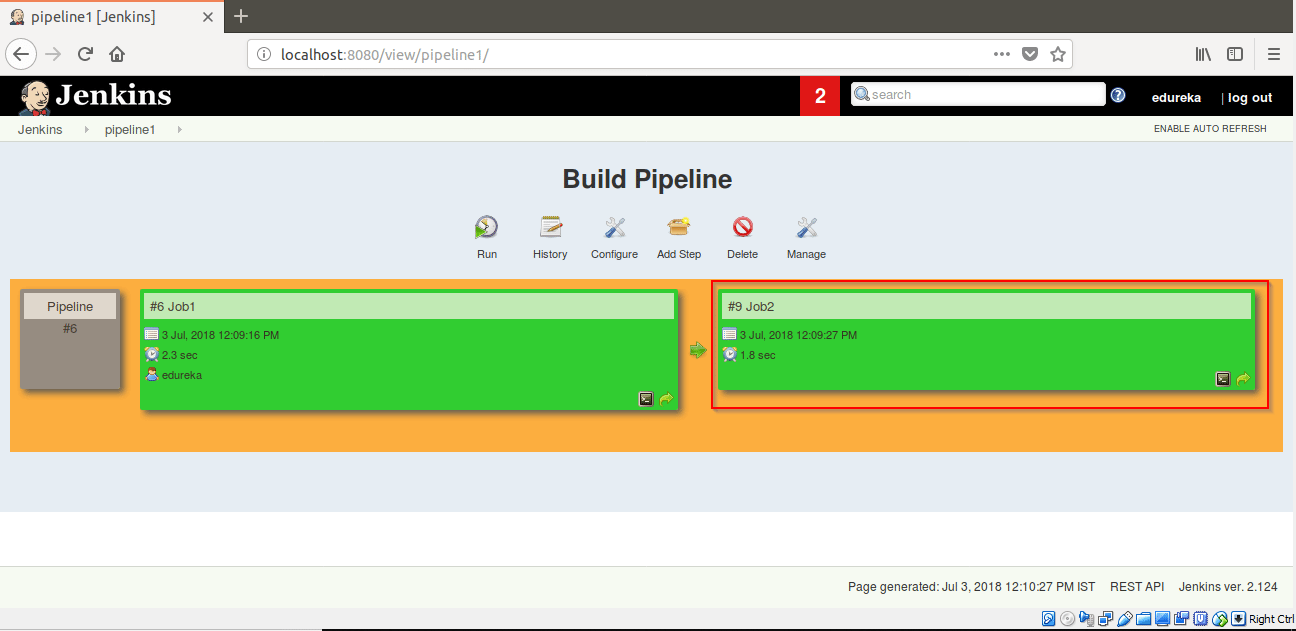
Step 23: Click on Run. Job1 will start building.
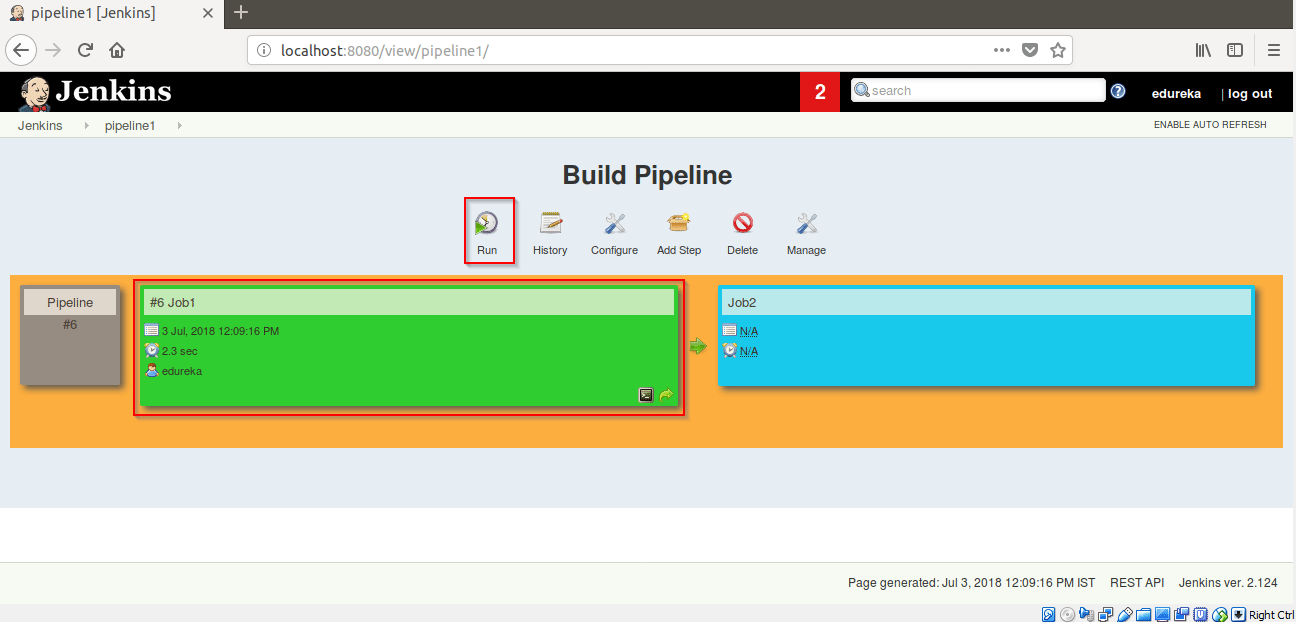
After building Job1, Job2 will automatically build itself.
So, this was all about the What Is Continuous Integration and its implementation using Jenkins.
 Thank you for registering Join Edureka Meetup community for 100+ Free Webinars each month JOIN MEETUP GROUP
edureka.co