Selenium Course
- 65k Enrolled Learners
- Weekend/Weekday
- Live Class
Most systems are developed under the assumption of normal operating conditions. It is important to ensure that it doesn’t breakdown under heavy loads. Software Testing makes sure that the system would not crash under crunch situations. This Stress Testing using JMeter article will guide you on how to perform stress testing in the following sequence:
Software testing provides the solution to all our problems about machines behaving the way we want them to. The different types of software testing help the tester determine the right choice of testing for the applications.
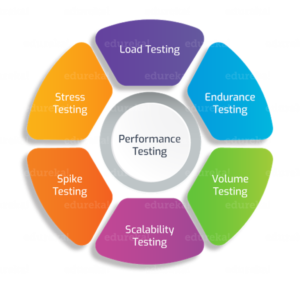
Performance Testing is a type of software testing which ensures that the application is performing well under workload. It is further divided into six different types such as:

This article focuses on Stress Testing and we will have a look at how you can perform stress testing using JMeter.
Stress Testing Using JMeter | Edureka
Stress Testing is a type of Software Testing that verifies the stability & reliability of the system. This test mainly determines the system on its robustness and error handling under extremely heavy load conditions.

Stress Testing ensures that the system would not crash under crunch situations. It tests beyond the normal operating point and evaluates how the system works under those extreme conditions. It also checks whether the system demonstrates effective error management.
It is important to perform Stress Testing on a website whenever there is a spike or a sudden surge in traffic. If you fail to accommodate this sudden traffic, it may result in loss of revenue and repute. Stress Testing is also required for the following reasons:
There are 5 steps that you need to follow while performing stress testing on any website:

1. Plan the Stress Test – In this step, you gather the system data, analyze the system and define the stress test goals.
2. Create Automation Scripts – Here, you need to create the Stress testing automation scripts and generate the test data for the stress scenarios.
3. Script Execution – In the third step, you run the Stress testing automation scripts and store the stress results.
4. Results Analysis – After storing the results, now you need to analyze the Stress Test results and identify bottlenecks.
5. Tweaking and Optimization – In the final step, you fine-tune the system, change configurations, and optimize the code to meet the desired benchmark.
Now you know about the different steps involved in the process of stress testing. So, let’s move ahead and have a look at the different types of stress testing and the tools required.
The different types of Stress Testing include:

These were some of the different types of stress testing. Now to perform these tests, you require certain tools. So, let’s have a look at some of the important tools used for stress testing.
Testing tools ensure that your applications are performing well in peak traffic and under extreme stress conditions. Below are some of the most commonly used stress/web testing tools:

You might get confused because there are a number of tools available for stress testing. But JMeter is one of the most preferred tools for performing stress testing on websites. So, let’s have a look at the steps required in the process of Stress Testing using JMeter.
I have already discussed about Apache JMeter in detail and also the steps involved in the installation of JMeter in my previous articles. So, let’s get started with the steps involved in performing stress testing.
Step 1 – First, you have to create your own Test Plan in JMeter.

Step 2 – Insert a Thread Group and add an HTTP request with the server name of your website on which you want to perform stress testing.

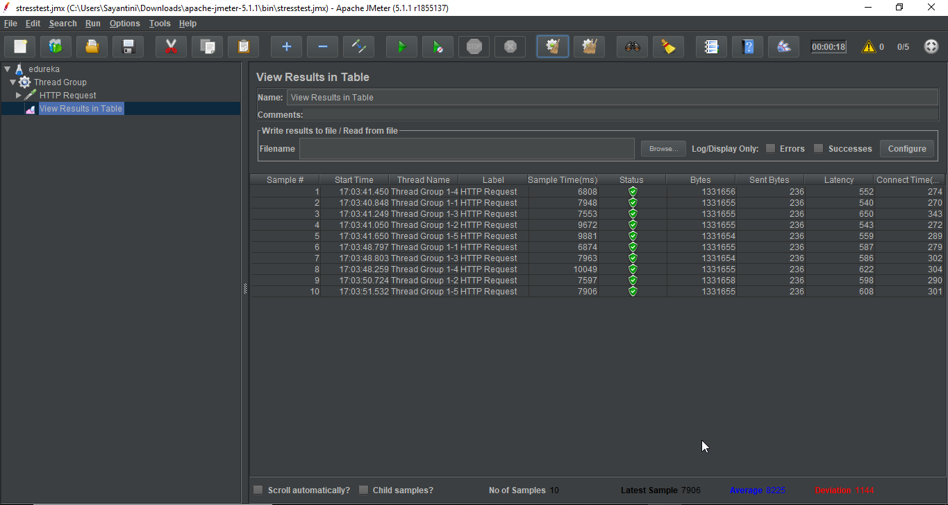
Step 3 – Next, you need to add a listener inside the thread group and view the test results. It will show the status of the test that has taken place.

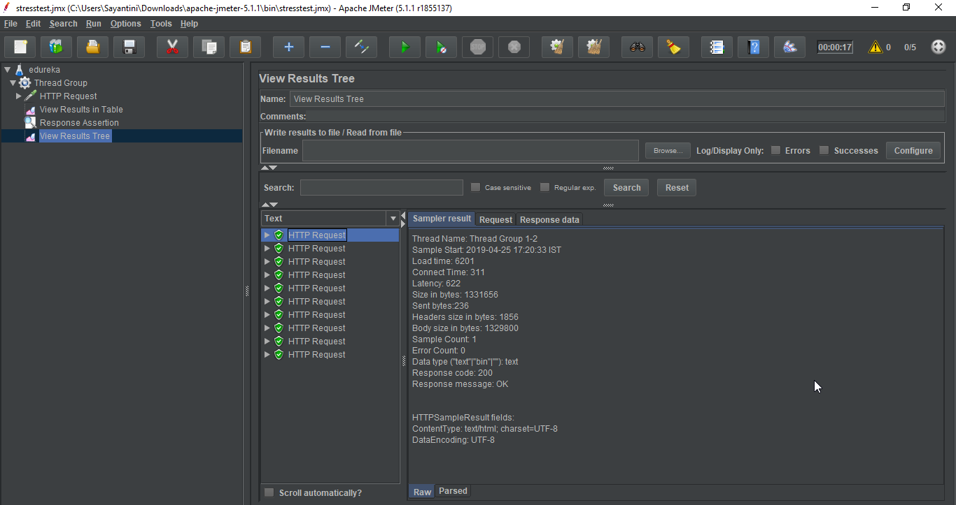
Step 4 – Now you need to add a response assertion inside your thread group. It is one of the most important element because it helps you to assert the response of request in your software load test plan.
We will assert for response code 200 using response assertion. Response code 200 represents the success of your HTTP request. If you change the value from 200 to any other number, the status of the test will change to unsuccessful.

Now you can add a number of users or threads and increase the loop count. So this will increase the stress on your server. But You can continue performing the test and view results in order to check the status of your website under a certain amount of stress.
Now that you have understood what is stress testing, check out the Performance testing course by Edureka which is designed to introduce you to the complete software testing life-cycle. You will be learning different levels of testing, test environment setup, test case design technique, test data creation, test execution, bug reporting, CI/CD pipeline in DevOps, and other essential concepts of software testing. Got a question for us? Please mention it in the comments section of “Stress Testing using JMeter” and we will get back to you.
 Thank you for registering Join Edureka Meetup community for 100+ Free Webinars each month JOIN MEETUP GROUP
edureka.co