DevOps Certification Training Course with Gen ...
- 194k Enrolled Learners
- Weekend/Weekday
- Live Class
DevOps is certainly incomplete without Jenkins. Jenkins along with Git is a wonderful combination. So in this article, I will talk about Jenkins Git Integration and its advantages. The pointers that we are going to cover are as follows:
So let us begin with our first topic.

We all know “Necessity is the mother of all inventions”. Similarly, Git emerged to fulfill certain necessities that the developers faced before Git. So, let us take a step back to learn all about Version Control Systems (VCS) and how Git came into existence.
Version Control is the management of changes to documents, computer programs, large websites and other collection of information.
There are two types of VCS:
Centralized Version Control System (CVCS)
Distributed Version Control System (DVCS)
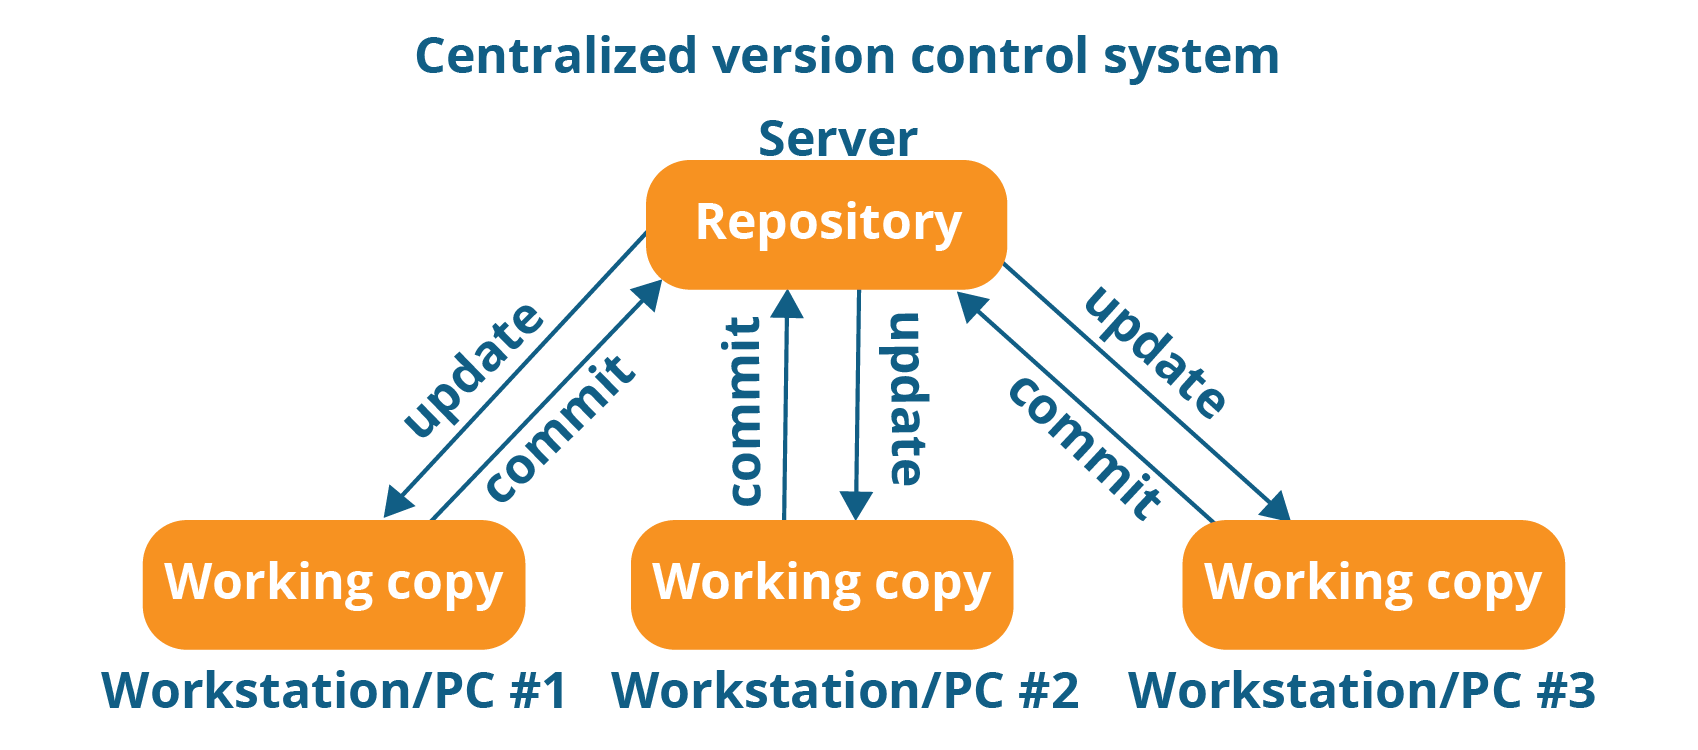
A centralized version control system (CVCS) uses a central server to store all files and enables team collaboration. It works on a single repository to which users can directly access a central server.
Please refer to the diagram below to get a better idea of CVCS:

The repository in the above diagram indicates a central server that could be local or remote which is directly connected to each of the programmer’s workstations.
Every programmer can extract or update their workstations with the data present in the repository. They can also make changes to the data or commit to the repository. Every operation is performed directly on the repository.
Even though it seems pretty convenient to maintain a single repository, it has some major drawbacks. Some of them are:
It is not locally available; meaning you always need to be connected to a network to perform any action.
Since everything is centralized, in any case of the central server getting crashed or corrupted will result in losing the entire data of the project.
This is where Distributed VCS solves the problem.
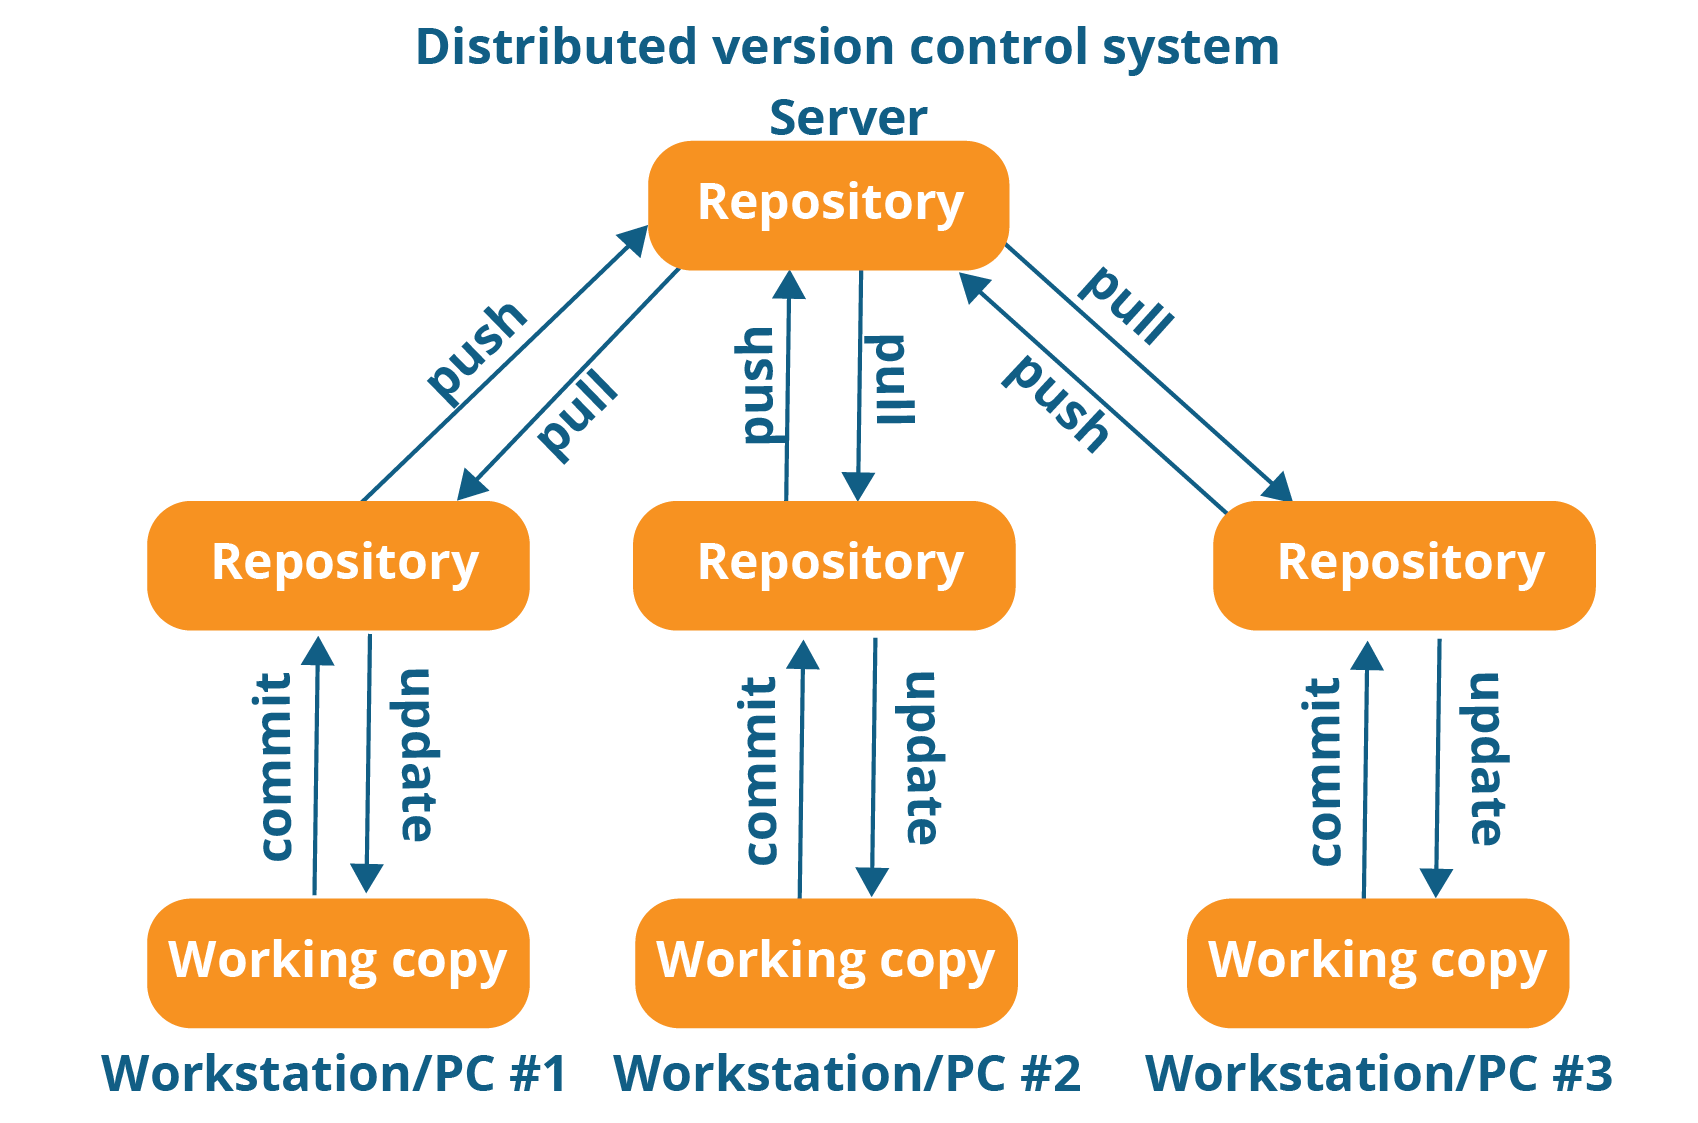
These systems do not necessarily rely on a central server to store all the versions of a project file. In Distributed VCS, every contributor has a local copy or “clone” of the main repository. Here everyone maintains a local repository of their own which contains all the files and metadata present in the main repository.
You will understand it better by referring to the diagram below:

As you can see in the above diagram, every programmer maintains a local repository on its own, which is actually the copy or clone of the central repository on their hard drive. They can commit and update their local repository without any interference.
They can update their local repositories with new data from the central server by an operation called “pull” and affect changes to the main repository by an operation called “push” from their local repository.
Now let us try to know about the definition of Git.
Git is a distributed version control tool that supports distributed non-linear workflows by providing data assurance for developing quality software. Tools like Git enable communication between the development and the operations team.
Normally when you are developing a large project you have a huge number of collaborators. So it is very important to have communication between the collaborators while making changes in the project.
Commit messages in Git play a very important role in communicating among the team. Apart from communication, the most important reason to use Git is that you always have a stable version of the code with you.
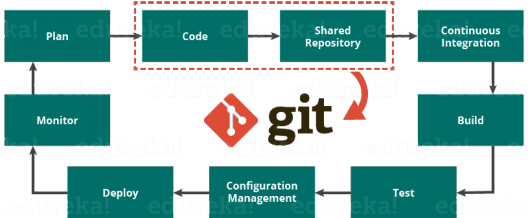
Hence, Git plays a vital role in succeeding at DevOps.

Jenkins is an open-source automation tool written in Java with plugins built for Continuous Integration purposes. Jenkins is used to build and test your software projects continuously making it easier for developers to integrate changes to the project, and making it easier for users to obtain a fresh build. It also allows you to continuously deliver your software by integrating with a large number of testing and deployment technologies.
With Jenkins, organizations can accelerate the software development process through automation. Jenkins integrates development life-cycle processes of all kinds, including build, document, test, package, stage, deploy, static analysis and much more.
Jenkins achieves Continuous Integration with the help of plugins. Plugins allow the integration of Various DevOps stages. If you want to integrate a particular tool, you need to install the plugins for that tool. For example Git, Maven 2 project, Amazon EC2, HTML publisher, etc.
It is an open-source tool with great community support.
Too easy to install.
It has 1000+ plugins to ease your work. If a plugin does not exist, you can code it and share it with the community.
It is free of cost.
It is built with Java and hence, it is portable to all the major platforms.
You now know how Jenkins overcomes the traditional SDLC shortcomings. The table below shows the comparison between “Before and After Jenkins”.

As discussed earlier, Git is a source control manager. That is where you keep your source code for tracking all the code changes that happen over time and to baseline the versions when they are ready for release.
Jenkins, on the other hand, is a continuous integration solution. It is devised to automate most of the tasks that a developer has to do while developing a new application (code quality checks, building, archiving of build artifacts, integration testing, deployment to various environments, etc.) Without a CI solution, a developer has to spend much time doing these repetitive non-productive tasks.
Let us take the example of a new feature in a web application. A developer will be identified and assigned to the task, he takes the existing codebase from the Source control – say, Git, makes his changes, carries out unit testing, ensures code quality manually and checks the new code back into Git.
Then he has to build the code, deploy it into integration instance, run integration testing and once the change seems satisfactory, raise a request for production deployment. Now, if only we had a minion to take care of this testing, building, quality checks and deployment sections the poor developer could have focused better on that stuff he is really good at – implementing and improving the feature’s logic.
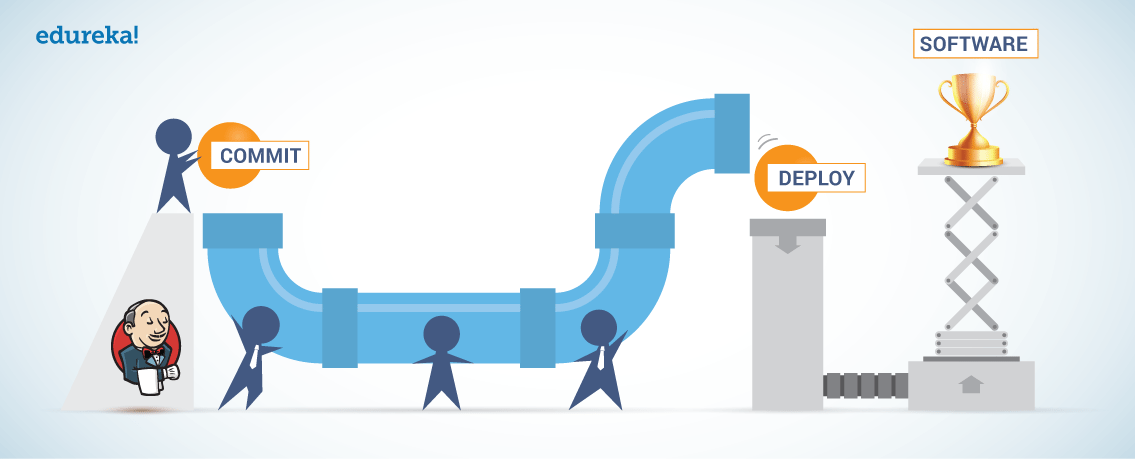
This minion is Jenkins. It acts as an orchestrator to run all these activities once the change is checked into source control (Git) and thus gives quick feedback to the developer whether the changes he has made are good enough for production deployment or not. It is an extremely flexible, open-source and has a ton of plugins that can do almost anything you wish it to do.
Here we will see how to integrate Git with Jenkins. There are 5 steps that you must follow :
You can create any sample program that you want like Java or Python or any other program. Here we will write a simple Python program that prints Hello, World!
Here first you need to start Jenkins using the command prompt.
For that, you first need to navigate to the Jenkins location on your system and use the command java -jar jenkins.war
After running this command, open the web browser and go to Jenkins’s home page using the link localhost:8080. This is the default port number.
Open Jenkins home page by entering the username and password.
For creating a project click on New Item and enter the project name and select Freestyle project. Click on OK.
Open git bash on your system. Navigate to the location of your program. Initialize an empty repository using the command git init.
Use the command git add . to add the file to the staging area from the working directory.
Now add the file to the local repository using the command git commit -m “demo.py file added”.
Now you have to push this file to the remote repository. For doing that go to your GitHub account and create a new public repository. Now copy the location of this repository and go to git bash terminal. Here type the command git remote add origin <location-of-repository>. Since now you have connected to the remote repository, you can now push your code there using the command git push -u origin master. To verify this go to GitHub account and refresh the page. You will see the file added there.
On Jenkins’s homepage go to Manage Jenkins.
Next click on Manage Plugins. Here check got Git plugin in the installed section. If it is not available here search for it in the available section and download it.
Go to the project in Jenkins that we created in step 2. Here in the Source Code Management section, select git and enter the link of the public repository that you created in step 3. Next in the Build Triggers section, click on Poll SCM option. Here in the Schedule part, you have to enter five asterisks separated by space. This is nothing but cron syntax for your job. This means that Jenkins will check for any changes in the source code every minute and if there is any change it will trigger the Jenkins build.
Click on Apply and then on Save. Next on your project home page click on Build Now. This will run the project and in the console output, you can see your program output the status of your Jenkins job. If everything is alright then it will display as Success.
So this how Jenkins Git Integration is done. With this, we have come to the end of this article on Jenkins Git Integration. I hope you have enjoyed this article.
Now that you have understood what Jenkins Git Integration is, check out this DevOps Course by Edureka, a trusted online learning company with a network of more than 250,000 satisfied learners spread across the globe. The Edureka DevOps Certification Training course helps learners to understand what is DevOps and gain expertise in various DevOps processes and tools such as Puppet, Jenkins, Nagios, Ansible, Chef, Saltstack and GIT for automating multiple steps in SDLC.
Got a question for us? Please mention it in the comments section and we will get back to you
 Thank you for registering Join Edureka Meetup community for 100+ Free Webinars each month JOIN MEETUP GROUP
edureka.co