Full Stack Development Internship Program
- 29k Enrolled Learners
- Weekend/Weekday
- Live Class
When you open any website, you might see alert pop-ups at times. These JavaScript alert boxes are useful for alerting users to something important. When a JavaScript alert box is triggered, a small box pops up and displays the text that you specify in your JavaScript code. In this article, we will see how the alert in JavaScript works, in the following sequence:
Let’s begin.
In JavaScript, you can find three kinds of popup boxes:
Alert box- An alert box is mostly used to make sure information comes through to the user. When an alert box pops up, you need to click “OK” to proceed.
Confirm box- A confirm box is mostly used to verify or accept something for the user. When a confirm box pops up, the user needs to click either “OK” or “Cancel” to proceed. If the user clicks “OK”, the box returns true. If the user clicks “Cancel”, the box returns false.
Prompt box- A prompt box is used by the user to input a value before entering a page. When a prompt box pops up, the user needs to click either “OK” or “Cancel” to proceed after entering an input value. If the user clicks “OK” the box returns the input value. If the user clicks “Cancel” the box returns null.
These were the different types of popup boxes. So, let’s get into the depth of the alert box and see how you can create an alert box in JavaScript.
The alert() method in JavaScript displays an alert box with a specified message and an OK button. It is often used to make sure that information comes through to the user.
The alert box takes the focus away from the current window and forces the browser to read the message. So, you should avoid overusing this method, as it prevents the user from accessing other parts of the page until the box is closed.
Syntax:
alert(message)
Here, the message is a string type that specifies the text to display in the alert box, or an object converted into a string and displayed. It is optional.
Example:
<img src="data:image/gif;base64,R0lGODlhAQABAIAAAAAAAP///yH5BAEAAAAALAAAAAABAAEAAAIBRAA7" data-wp-preserve="%3Cscript%3E%0Afunction%20myFunction()%20%7B%0Aalert(%22This%20is%20an%20Alert!%22)%3B%0A%7D%0A%3C%2Fscript%3E" data-mce-resize="false" data-mce-placeholder="1" class="mce-object" width="20" height="20" alt="<script>" title="<script>" />
Output:
The alert() method in JavaScript displays an alert box. It displays a specified message along with an OK button and is generally used to make sure that the user gets the information. It returns a string which represents the text to display in the alert box. Let’s take an example and see how to create an alert in JavaScript:
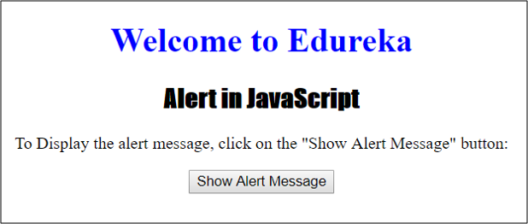
<!DOCTYPE html> <html> <head> <title> Alert() Method in JavaScript </title> <img src="data:image/gif;base64,R0lGODlhAQABAIAAAAAAAP///yH5BAEAAAAALAAAAAABAAEAAAIBRAA7" data-wp-preserve="%3Cstyle%3E%0Ah1%20%7B%0Acolor%3A%20Blue%3B%0A%7D%0A%0Ah2%20%7B%0Afont-family%3A%20Impact%3B%0A%7D%0A%0Abody%20%7B%0Atext-align%3A%20center%3B%0A%7D%0A%3C%2Fstyle%3E" data-mce-resize="false" data-mce-placeholder="1" class="mce-object" width="20" height="20" alt="<style>" title="<style>" /> </head> <body> <h1>Welcome to Edureka</h1> <h2>Alert in JavaScript</h2> <p> To Display the alert message, click on the "Show Alert Message" button: </p> <button ondblclick="myalert()"> Show Alert Message </button> <img src="data:image/gif;base64,R0lGODlhAQABAIAAAAAAAP///yH5BAEAAAAALAAAAAABAAEAAAIBRAA7" data-wp-preserve="%3Cscript%3E%0Afunction%20myalert()%20%7B%0Aalert(%22This%20is%20the%20Alert%20Message!%22)%3B%0A%7D%0A%3C%2Fscript%3E" data-mce-resize="false" data-mce-placeholder="1" class="mce-object" width="20" height="20" alt="<script>" title="<script>" /> </body> </html>
Output:

After you double click the button, you will get the following output:

With this, we have come to the end of our article. I hope you understood what is an alert in JavaScript and how you can create an alert box. If you’re just beginning, then watch at this Java Tutorial to Understand the Fundamental Java Concepts.
Check out our Full Stack java Developer Training which comes with instructor-led live training and real-life project experience. This training makes you proficient in skills to work with back-end and front-end web technologies. It includes training on Web Development, jQuery, Angular, NodeJS, ExpressJS, and MongoDB.
Got a question for us? Please mention it in the comments section of “Alert in JavaScript” blog and we will get back to you.
 Thank you for registering Join Edureka Meetup community for 100+ Free Webinars each month JOIN MEETUP GROUP
edureka.co