Selenium Course
- 64k Enrolled Learners
- Weekend/Weekday
- Live Class
Since there is so much dependency on the web today, ensuring up-time and functioning of web apps is an evident need. Selenium is an automation testing tool developed precisely for that purpose, and this blog lists the frequently asked Selenium Interview Questions for those(freshers & experienced) planning to get into testing domain.
Before I begin discussing the questions, I’d like to emphasize that Manual testing is time-consuming, tedious, boring, and prone to errors. This gave rise to automation testing and in-turn, demand for Selenium automation testers.

Putting the technical questions aside, you might also be asked a few tricky Selenium interview questions about why only Selenium and not any other tool. That is because Selenium is open source and it’s easy adoption has earned it the tag of being the poster boy of web testing tools. With a whopping 300 percent increase in job postings over the past three years, testing has presented itself as an entry point into the IT world for professionals from various domains. Organizations are hunting for professionals with Online Selenium Course.
So, read the entire list of Java interview questions for Selenium covered in this blog and prepare yourself for a job interview of a Selenium tester. Let’s get started!
The entire set of questions is divided into three sections:
The differences are listed below.
Selenium vs HP QTP vs TestComplete
| Features | Selenium | HP QTP | TestComplete |
|---|---|---|---|
| License | Open Source | Required | Required |
| Cost | Free | High | High |
| Customer support | Yes; Open source community | Yes | Yes |
| Release Cycles/ Development Sprints | Smaller release cycles with immediate feedback | Smaller release cycles | Agility only |
| Coding skills | Very High | Low | High |
| Environment support | Windows, Linux, Mac | Only Windows | Windows only (7, Vista, Server 2008 or later OS) |
| Language support | Language support | VB Script | VB Script, JS Script, Delphi Script, C++ & C# |
Selenium v1 included only three suite of tools: Selenium IDE, Selenium RC and Selenium Grid. Note that there was no WebDriver in Selenium v1. Selenium WebDriver was introduced in Selenium v2. With the onset of WebDriver, Selenium RC got deprecated and is not in use since. Older versions of RC is available in the market though, but support for RC is not available. Currently, Selenium v3 is in use, and it comprises of IDE, WebDriver and Grid. Selenium 4 is actually the latest version. You can even check out the details of the Automation with the Automation Course.
IDE is used for recording and playback of tests, WebDriver is used for testing dynamic web applications via a programming interface and Grid is used for deploying tests in remote host machines.
Exceptions in Selenium are similar to exceptions in other programming languages. The most common exceptions in Selenium are:
An exception test is an exception that you expect will be thrown inside a test class. If you have written a test case in such way that it should throw an exception, then you can use the @Test annotation and specify which exception you will be expecting by mentioning it in the parameters. Take a look at the example below: @Test(expectedException = NoSuchElementException.class)
Do note the syntax, where the exception is suffixed with .class
We use Excel sheets because they can be used as data sources for tests. An excel sheet can also be used to store the data set while performing DataDriven Testing. These are the two main reasons for using Excel sheets.
When you use the excel sheet as data source, you can store the following:
Application URL for all environments: You can specify the URL of the environment in which you want to do the testing like: development environment or testing environment or QA environment or staging environment or production/ pre-production environment.
User name and password credentials of different environments: You can store the access credentials of the different applications/ environments in an Excel sheet. You can store them in an encoded format, and whenever you want to use them, you can decode them instead of leaving them plain and unprotected.
Test cases to be executed: You can list the entire set of test cases in a column, and in the next column, you can specify either Yes or No, which indicates whether you want that particular test case to be executed or ignored.
When you use the Excel sheet for Data-Driven Tests, you can store the data for different iterations of the tests. For example, while testing a web page, the different sets of input data that need to be passed to the test box can be stored in the Excel sheet.
Selenium provides a PROXY class to redirect browsing from a proxy. Look at the example below:
String PROXY = “199.201.125.147:8080”;

org.openqa.selenium.Proxy proxy = new.org.openqa.selenium.Proxy();
proxy.setHTTPProxy(Proxy)
 .setFtpProxy(Proxy)
 .setSslProxy(Proxy)
DesiredCapabilities cap = new DesiredCapabilities();
cap.setCapability(CapabilityType.PROXY, proxy);
WebDriver driver = new FirefoxDriver(cap);
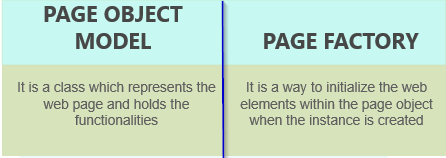
The page object model is a design pattern that creates an object repository for web UI elements. Each web page in the application is required to have its own corresponding page class. The page class is thus responsible for finding the web Elements on that page and then performing operations on those web Elements.
The advantages of using POM are:
Related Article: Performance Testing Interview Questions
Page Factory provides an optimized way to implement the Page Object Model. When we say it is optimized, we mean that the memory utilization is very good and that the implementation is done in an object-oriented manner.
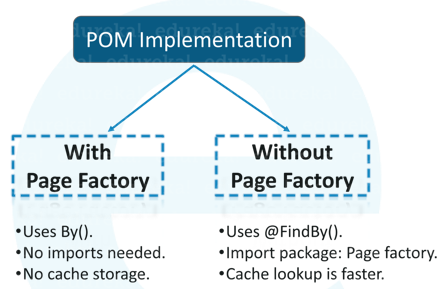
Page Factory is used to initialize the elements of the Page Object or instantiate the Page Objects itself. Annotations for elements can also be created (and recommended) as the describing properties may not always be descriptive enough to differentiate one object from the other.
The concept of separating the Page Object Repository and Test Methods is also followed here. Instead of having to use ‘FindElements,’ we use annotations like: @FindBy to find WebElement and the initElements method to initialize web elements from the Page Factory class.
@FindBy can accept tagName, partialLinkText, name, linkText, id, css, className & xpath as attributes.
There are basically two types of wait statements: Implicit Wait and Explicit Wait.
Implicit wait instructs the WebDriver to wait for some time by polling the DOM. Once you have declared implicit wait, it will be available for the entire life of the WebDriver instance. By default, the value will be 0. If you set a longer default, then the behavior will poll the DOM on a periodic basis depending on the browser/ driver implementation.
Explicit wait instructs the execution to wait for some time until some condition is achieved. Some of those conditions to be attained are:
We can write a code such that we specify the XPath of the web element that needs to be visible on the page and then ask the WebDriver to wait for a specified time. Look at the sample piece of code below:
WebDriverWait wait=new WebDriverWait(driver, 20); Element = wait.until(ExpectedConditions.visibilityOfElementLocated(By.xpath( &ldquo;<xpath&rdquo;)));
Similarly, we can write another piece of code asking the WebDriver to wait until an error appears like this:
WebDriverWait wait=new WebDriverWait(driver, 20);
Element = wait.until(ExpectedConditions.alertIsPresent());
JavaScriptExecutor is an interface that provides a mechanism to execute Javascript through the Selenium WebDriver. It provides “executescript” and “executeAsyncScript” methods to run JavaScript in the context of the currently selected frame or window. An example of that is:
JavascriptExecutor js = (JavascriptExecutor) driver;
js.executeScript(Script,Arguments);
We can scroll down a page by using window.scrollBy() function. Example:
((JavascriptExecutor) driver).executeScript("window.scrollBy(0,500)");
To scroll down to a particular element on a web page, we can use the function scrollIntoView(). Example:
((JavascriptExecutor) driver).executeScript("arguments[0].scrollIntoView();", element);
We can handle special keyboard and mouse events by using Advanced User Interactions API. The Advanced User Interactions API contains the Actions and the Action Classes that are needed to execute these events. The most commonly used keyboard and mouse events provided by the Actions class are in the table below:
Selenium functions and their explanation
| Method | Description |
|---|---|
| clickAndHold() | Clicks (without releasing) the current mouse location. |
| dragAndDrop() | Performs click-and-hold at the location of the source element, moves. |
| source, target() | Moves to the location of the target element, then releases the mouse. |
The different types of frameworks are:
Some of the file types of the dataset can be: excel, xml, text, csv, etc.
We can fetch the attribute of an element by using the getAttribute() method. Sample code:
WebElement eLogin = driver.findElement(By.name(&ldquo;Login&rdquo;);
String LoginClassName = eLogin.getAttribute("classname");
Here, I am finding the login button for the web page named ‘Login’. Once that element is found, getAttribute() can be used to retrieve any attribute value of that element and it can be stored it in string format. In my example, I have retrieved the ‘class name’ attribute and stored it in LoginClassName.
Similarly, we can use the getText () method to retrieve text from any textbox. In the code below, I have retrieved the text typed in the ‘Login’ element.
WebElement eLogin = driver.findElement(By.name(&ldquo;Login&rdquo;); String LoginText = Login.getText ();
The Selenium WebDriver tutorial below provides a detailed demonstration of locating elements on a web page using different element locator techniques and the basic methods/ functions that can be applied to those elements.
Selenese is the set of selenium commands which are used to test your web application.
You can even make use of:
Selenium does not support handling pop-ups. An alert is a pop-up window that displays a warning message.
A few methods using which this can be achieved:
This Robot class provides control over the mouse and keyboard devices.
The methods include:
A window handle is a unique identifier that holds the address of all the windows. This is basically a pointer to a window, which returns the string value.
It is defined as an interface that modifies the behavior of the system. Listeners allow customization of reports and logs.
Listeners mainly comprise of two types, namely
Yes. You can navigate in the browser. A few methods using which you can achieve it are:
From here on, we’ll be looking at the most important advanced-level Selenium interview questions for testers.
When we generally use ALT/SHIFT/CONTROL keys, we hold onto those keys and click other buttons to achieve the special functionality. So it is not enough just to specify keys.ALT or keys.SHIFT or keys.CONTROL functions.
For the purpose of holding onto these keys while subsequent keys are pressed, we need to define two more methods: keyDown(modifier_key) and keyUp(modifier_key)
Parameters: Modifier_key (keys.ALT or Keys.SHIFT or Keys.CONTROL)
Purpose: Performs a modifier key press and does not release the modifier key. Subsequent interactions may assume it’s kept pressed.
Parameters: Modifier_key (keys.ALT or Keys.SHIFT or Keys.CONTROL)
Purpose: Performs a key release.
Hence with a combination of these two methods, we can capture the special function of a particular key.
public static void main(String[] args)
{
String baseUrl = &ldquo;https://www.facebook.com&rdquo;;
WebDriver driver = new FirefoxDriver();
driver.get("baseUrl");
WebElement txtUserName = driver.findElement(By.id(&ldquo;Email&rdquo;);
Actions builder = new Actions(driver);
Action seriesOfActions = builder
.moveToElement(txtUerName)
.click()
.keyDown(txtUserName, Keys.SHIFT)
.sendKeys(txtUserName, &ldquo;hello&rdquo;)
.keyUp(txtUserName, Keys.SHIFT)
.doubleClick(txtUserName);
.contextClick();
.build();
seriesOfActions.perform();
}
You can take a screenshot by using the TakeScreenshot function. By using getScreenshotAs() method you can save that screenshot. Example:
File scrFile = ((TakeScreenshot)driver).getScreenshotAs(outputType.FILE);
To maximize the size of browser window, you can use the following piece of code:
driver.manage().window().maximize(); – To maximize the window
To resize the current window to a particular dimension, you can use the setSize() method. Check out the below piece of code:
System.out.println(driver.manage().window().getSize());
Dimension d = new Dimension(420,600);
driver.manage().window().setSize(d);
To set the window to a particular size, use window.resizeTo() method. Check the below piece of code:
((JavascriptExecutor)driver).executeScript("window.resizeTo(1024, 768);");
Find out our Selenium Training in Top Cities/Countries
| India | Other Cities/Countries |
| Bangalore | US |
| Hyderabad | UK |
| Pune | Canada |
| Chennai | Australia |
| Mumbai | Singapore |
| Kolkata | Edinburgh |
Questions on dropdown and selecting a value from that dropdown are very common Selenium interview questions because of the technicality involved in writing the code.
The most important detail you should know is that to work with a dropdown in Selenium, we must always make use of this html tag: ‘select’. Without using ‘select’, we cannot handle dropdowns. Look at the snippet below in which I have written a code for a creating a dropdown with three options.
<select id="mySelect">
<option value="option1">Cars</option>
<option value="option2">Bikes</option>
<option value="option3">Trains</option>
</select>
In this code we use ‘select’ tag to define a dropdown element and the id of the dropdown element is ‘myselect’. We have 3 options in the dropdown: Cars, Bikes and Trains. Each of these options, have a ‘value’ attribute also assigned to them. First option from dropdown has value assigned as ‘option1’, second option has value = ‘option2’ and similarly third option has value assigned as ‘option3’.
If you are clear with the concept, you can proceed to the next aspect of choosing a value from the dropdown. This is a 2 step process:
To identify the ‘select’ html element from the web page, we need to use findElement() method. Look at the below piece of code:
WebElement mySelectElement = driver.findElement(By.id("mySelect"));
Select dropdown = new Select(mySelectElement);
Now to select an option from that dropdown, we can do it in either of the three ways:
Note that from the above example, in all the three cases, “Bikes” will be chosen from the dropdown. In the first case, we are choosing by visible text on the web page. Regarding selection by index, 1 represents “Bikes” because indexing values start from 0 and then get incremented to 1 and 2. Finally in case of selection by value attribute, ‘option2’ refers to “Bikes”. So, these are the different ways to choose a value from a dropdown.
If you click on a link in a web page, then for changing the WebDriver’s focus/ reference to the new window we need to use the switchTo() command. Look at the below example to switch to a new window:
driver.switchTo().window();
Here, ‘windowName’ is the name of the window you want to switch your reference to.
In case you do not know the name of the window, then you can use the driver.getWindowHandle() command to get the name of all the windows that were initiated by the WebDriver. Note that it will not return the window names of browser windows which are not initiated by your WebDriver.
Once you have the name of the window, then you can use an enhanced for loop to switch to that window. Look at the piece of code below.
String handle= driver.getWindowHandle();
for (String handle : driver.getWindowHandles())
{
driver.switchTo().window(handle);
}
Related Learning: Top Manual Testing Interview Questions
To upload a file using selenium we can simply use the command element.send_keys(file path). But there is a prerequisite before we upload the file. We have to use the html tag: ‘input’ and attribute type should be ‘file’. Take a look at the below example where we are identifying the web element first and then uploading the file.
<input type="file" name="uploaded_file" size="50" class="pole_plik">
element = driver.find_element_by_id(&rdquo;uploaded_file")
element.send_keys("C:myfile.txt")
Yes. We can enter/ send text without using sendKeys() method. We can do it using JavaScriptExecutor.
How do we do it?
Using DOM method of, identification of an element, we can go to that particular document and then get the element by its ID (here login) and then send the text by value. Look at the sample code below:
JavascriptExecutor jse = (JavascriptExecutor) driver;
jse.executeScript("document.getElementById(&lsquo;Login').value=Test text without sendkeys");
Since there will be popup for logging in, we need to use the explicit command and verify if the alert is actually present. Only if the alert is present, we need to pass the username and password credentials. The sample code for using the explicit wait command and verifying the alert is below:
WebDriverWait wait = new WebDriverWait(driver, 10);
Alert alert = wait.until(ExpectedConditions.alertIsPresent());
alert.authenticateUsing(new UserAndPassword(**username**, **password**));
This is a tricky question which the interviewer will present to you. He can provide a situation where in there are 20 links in a web page, and we have to verify which of those 20 links are working and how many are not working (broken).
Since you need to verify the working of every link, the workaround is that, you need to send HTTP requests to all of the links on the web page and analyze the response. Whenever you use driver.get() method to navigate to a URL will respond with a status of 200 – OK. 200 – OK denotes that the link is working and it has been obtained. If any other status is obtained, it indicates that the link is broken.
But how will you do that?
First, we have to use the anchor tags <a> to determine the different hyperlinks on the web page. For each <a> tag, we can use the attribute ‘href’ value to obtain the hyperlinks and then analyze the response received for each hyperlink when used in driver.get() method.
If neither frame name nor frame id is available, then we can use frame by index.
Let’s say, that there are 3 frames in a web page and if none of them have frame name and frame id, then we can still select those frames by using frame (zero-based) index attribute. Each frame will have an index number. The first frame would be at index “0”, the second at index “1” and the third at index “2”. Once the frame has been selected, all subsequent calls on the WebDriver interface will be made to that frame.
driver.switchTo().frame(int arg0);
From here on, you’ll read all the TestNG and Selenium Webdriver interview questions for experienced professionals.
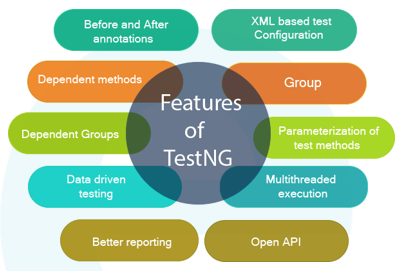
I’m pretty sure you all know the importance of TestNG. Since Selenium does not support report generation and test case management, we use TestNG framework with Selenium. TestNG is much more advanced than JUnit, and it makes implementing annotations easy. That is the reason TestNG framewrok is used with Selenium WebDriver.
But have you wondered where to define the test suites and grouping of test classes in TestNG?
It is by taking instructions from the testng.xml file. We cannot define a test suite in testing source code, instead it is represented in an XML file, because suite is the feature of execution. The test suite, that I am talking about is basically a collection of test cases.
So for executing the test cases in a suite, i.e a group of test cases, you have to create a testng.xml file which contains the name of all the classes and methods that you want to execute as a part of that execution flow.
Other advantages of using testng.xml file are:
Parameterization is the technique of defining values in testng.xml file and sending them as parameters to the test class. This technique is especially useful when we need to pass multiple login credentials of various test environments. Take a look at the code below, in which “myName” is annotated as a parameter.
public class ParameterizedTest1{
 @Test
 @Parameters("myName")
 public void parameterTest(String myName) {
 System.out.println("Parameterized value is : " + myName);
 }
}
To pass parameters using testng.xml file, we need to use ‘parameters’ tag. Look at the below code for example:
<?xml version="1.0" encoding="UTF-8"?>
<!DOCTYPE suite SYSTEM "http://testng.org/testng-1.0.dtd" >
<suite name=&rdquo;CustomSuite">
<test name=&rdquo;CustomTest&rdquo;>
<parameter name="myName" value=&rdquo;John"/>
<classes>
<class name="ParameterizedTest1" />
</classes>
</test>
</suite>
To extensively understand the working of TestNG and it’s benefit when used with Selenium, watch the below Selenium tutorial video.
DataProvider is a TestNG feature, which enables us to write DataDriven tests. When we say, it supports DataDriven testing, then it becomes obvious that the same test method can run multiple times with different data-sets. DataProvider is in fact another way of passing parameters to the test method.
@DataProvider marks a method as supplying data for a test method. The annotated method must return an Object[] where each Object[] can be assigned to parameter list of the test method.
To use the DataProvider feature in your tests, you have to declare a method annotated by @DataProvider and then use the said method in the test method using the ‘dataProvider‘ attribute in the Test annotation.
As far as the second part of the question is concerned, Yes, the same DataProvider can be used in multiple functions and classes by declaring DataProvider in separate class and then reusing it in multiple classes.
If you want to skip a particular test method, then you can set the ‘enabled’ parameter in test annotation to false.
@Test(enabled = false)
By default, the value of ‘enabled’ parameter will be true. Hence it is not necessary to define the annotation as true while defining it.
Soft Assertions are customized error handlers provided by TestNG. Soft Assertions do not throw exceptions when assertion fails; they simply continue to the next test step. They are commonly used when we want to perform multiple assertions.
To mark a test as failed with soft assertions, call assertAll() method at the end of the test.
In TestNG, methods can be categorized into groups. When a particular group is being executed, all the methods in that group will be executed. We can execute a group by parameterizing it’s name in group attribute of @Test annotation. Example: @Test(groups={“xxx”})
@Test(groups={&ldquo;Car&rdquo;})
public void drive(){
system.out.println(&ldquo;Driving the vehicle&rdquo;);
}
@Test(groups={&ldquo;Car&rdquo;})
public void changeGear() {
system.out.println("Change Gears&rdquo;);
}
@Test(groups={&ldquo;Car&rdquo;})
public void accelerate(){
system.out.println(&ldquo;Accelerating&rdquo;);
}
Dependency is a feature in TestNG that allows a test method to depend on a single or a group of test methods. Method dependency only works if the “depend-on-method” is part of the same class or any of the inherited base classes (i.e. while extending a class).
Syntax: @Test(dependsOnMethods = { “initEnvironmentTest” })
@Test(groups={&ldquo;Car&rdquo;})
public void drive(){
system.out.println(&ldquo;Driving the vehicle&rdquo;);
}
@Test(dependsOnMethods={&ldquo;drive&rdquo;},groups={cars})
public void changeGear() {
system.out.println("Change Gears&rdquo;);
}
@Test(dependsOnMethods={&ldquo;changeGear&rdquo;},groups={&ldquo;Car&rdquo;})
public void accelerate(){
system.out.println(&ldquo;Accelerating&rdquo;);
}
@Test(invocationCount=?) is a parameter that indicates the number of times this method should be invoked.
@Test(threadPoolSize=?) is used for executing suites in parallel. Each suite can be run in a separate thread.
To specify how many times @Test method should be invoked from different threads, you can use the attribute threadPoolSize along with invocationCount. Example:
@Test(threadPoolSize = 3, invocationCount = 10)
public void testServer() {
}
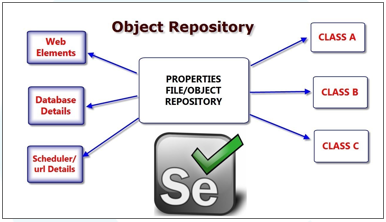
An object repository is a common storage location for all objects. In the Selenium WebDriver context, objects would typically be the locators used to uniquely identify web elements.
It is a mechanism that involves more than one component to work parallel with each other.
Synchronization can be classified into two categories:
Related Learning: Top Software Testing Interview Questions
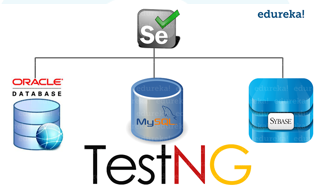
Selenium does not support Database Testing, still, it can be partially done using JDBC and ODBC.
So this brings us to the end of the detailed blog. Alternatively, you can check out this video on Selenium interview questions delivered by an industry expert where he also talks about the industry scenario and how questions will be twisted and asked in an interview. In this we just specify timeout value only. We will make the tool to wait until certain amount of time and then proceed further.
If you wish to learn Selenium and build a career in the testing domain, check out our interactive, live-online Selenium Training, with 24*7 support to guide you throughout your learning period.
Do you have a question for us? Please mention it in the comments section, and we will respond to you.
 Thank you for registering Join Edureka Meetup community for 100+ Free Webinars each month JOIN MEETUP GROUP
edureka.co