

React JS Training Course
- 24k Enrolled Learners
- Weekend/Weekday
- Live Class
(7200)


 Copy Link!
If you’ve never used React, it might seem hard to start. Don’t worry, though! There are steps in this blog that will help you do everything, from downloading React to setting up your first project.
We’ll talk about what you need to get started, the different ways to install React, and then how to make and run your first app. You’ll have a project that works and a strong base to start building React apps by the end. Let’s get started!
You will learn how to use this tool in your project now that you know what React is and why it’s useful.
Please make sure that Node.js is already on your computer before you start installing React.
That’s because Node.js is a JavaScript runtime environment that lets you run JavaScript on the server, and React.js is a JavaScript package. You add JavaScript methods to your React project when you write it, and Node.js helps run this JavaScript code on the web page.
Different versions of Node.js exist. The most recent stable version is the one that is suggested because it has big changes. Some of these changes are bug fixes, security updates, making sure that your project’s requirements work with the new version, and so on.
Go to the Node.js page to install Node. As you can see in the picture below, their website lets you download either the suggested version or the most recent version.
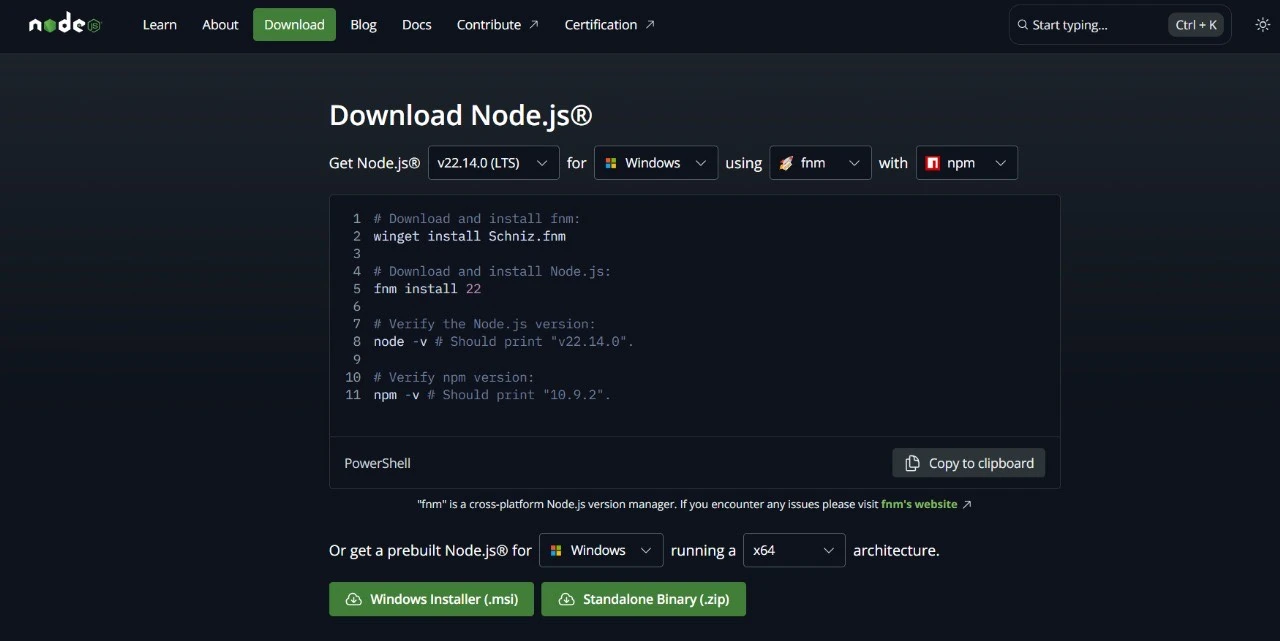 Now that you have the version you want, you need to install it on your computer.
Open your command prompt to make sure that Node was loaded correctly once the installation is done. At the command line, type “node -v” and press “Enter.” This command should show you what version of Node is running on your computer right now.
Here is what it looks like:
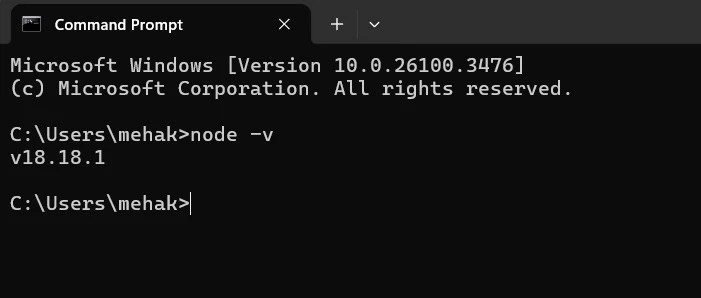 Node version displayed in the command prompt
At this point, you can add React to your project. Let’s do the steps together.
We’ll start by looking at the “traditional” way to install React, which is to use create-react-app (CRA). This way, you’ll know how to do it. Then we’ll look at how to use the new Vite build tool to install it.
ReactJS Installation Tutorial
While you’re still in the command prompt window, go to the area where you want to make your React project. To do this, type cd [directory name] then click enter.
cd documents command to go to documents the directory.
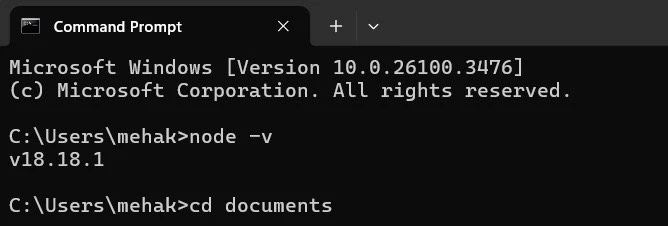 You can see in the picture above that I’m going to the documents area, which is where I want to make my React project.
Make a folder that you will use to build your React app in the documents area or wherever you are working on your project.
type mkdir [folder name]then navigate to the newly created directory using cd [newly created folder name].
After navigating to your newly created project directory, run the command npx create-react-app [your-project-name] and allow the setup process to complete. Once the installation is finished, you will see a confirmation message indicating that your React project has been successfully created.
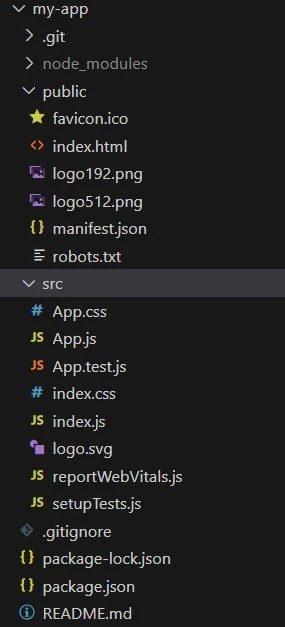
React Complete Installation Display Using CRA.
In the above image, let’s go over some of the elements you’ll see there.
App.js, index.js, and App.css, as seen in the image above.The React team no longer recommends using create-react-app since it was removed not long ago. You don’t have to stress out when making React apps with other current tools that make front-end development faster.
Some examples of these kinds of tools are Gatsby, Next.js, Percel, Vite, and Snowpack.
These steps will teach you how to use the Vite tool to add React to your project.
Vite is a modern tool that is very fast and can be changed to fit your needs. Its goal is to make the development of current web projects more linear. It saves time and makes sure that your React apps work well. Make-react-app (CRA) features are also in it.
The first thing you need to do is make sure Node is already on your computer, just like we did when we used CRA to install React. Next, go to the location you want to use and make a new folder. You can give it any name you want.
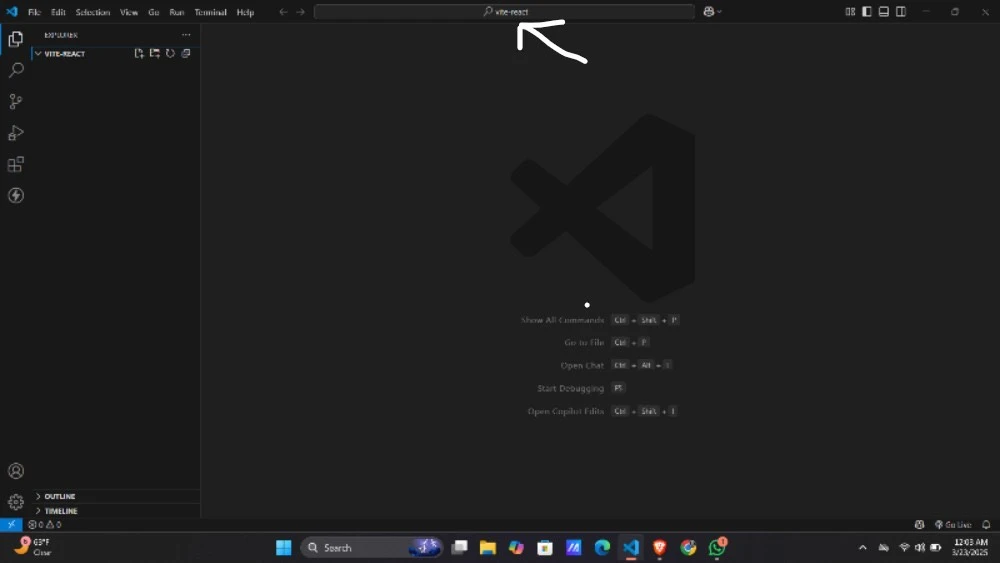
Open the newly created folder in your code editor (VS code).
 Vite_React
Yours should look like the picture above. The box I made for me was called Vite_React.
As shown above, the next step is to open the terminal, which is between Run and Help.
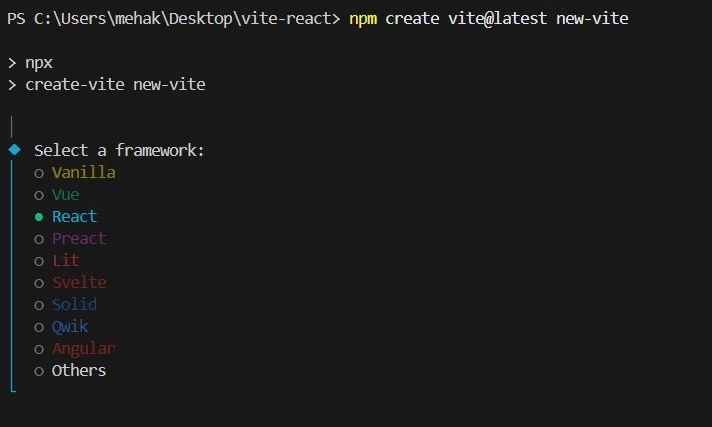
Open your terminal and execute the command npm create vite@latest [your-project-name]. For example, if you name your project new-react-vite, the command would be structured accordingly.
 Select Framework (React)
We are now asked to choose what framework we want to install. Since you are working on React, use the arrow keys to get to where it says “React,” then press “Enter.”
 Select language (Javascript)
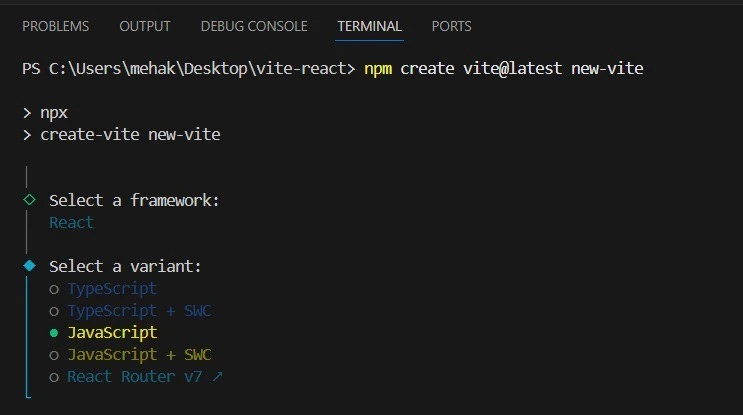
The next step is to pick a language for your project from the picture above. You can pick any language, but I picked JavaScript for this tutorial.
The next step is to navigate to the project directory where you created the React project. To do this, type cd [directory name]. Yours should look like this:
![cd [directory name] command](/blog/wp-content/uploads/2025/03/32f66241-eebd-44bb-ac20-7f8d8896101a.webp) React Complete Installation Using Vite
React Complete Installation Using Vite
If you did everything right, your React files should now be made and shown on the screen like this:
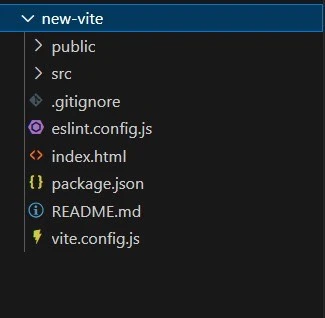
React Installation Display
Finally, install the node_modules folder by running npm install in the terminal. The installation process may take some time, but once it’s complete, you should see the node_modules folder appear at the top.
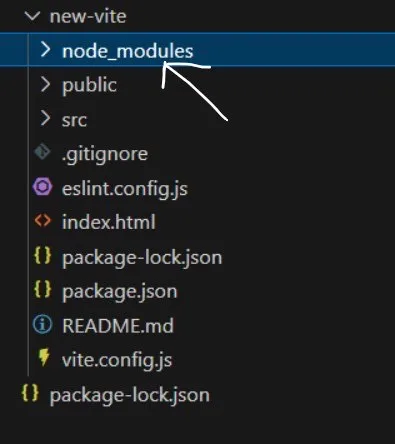 Node Modules folder
Lastly, type npm run dev to run your project and display on the web page. If you followed the installation steps correctly, you should see your local host:
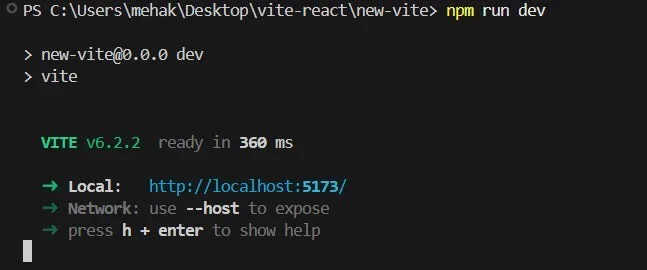 Local host
Click on your area host while holding down the control button. This goes to the website. At this point, if this is how your web page looks:
 Final React Display on the web page
Congratulations on installing React on your project!
Conclusion
You can make interactive and appealing apps with the React library, which is a powerful open-source JavaScript tool. Getting your hands on this system is fun, so I suggest you give it a try.
I think that with the current tool (like Vite), you can now fully add React to your project. If you’ve already done it, good job!


 Thank you for registering Join Edureka Meetup community for 100+ Free Webinars each month JOIN MEETUP GROUP


