DevOps Certification Training
- 187k Enrolled Learners
- Weekend/Weekday
- Live Class
This is the third and final post in the “Hacking Git and GitHub” blog series. We have already covered some very important features of Git and GitHub in the previous blogs in the series, and in this post we will round it off by covering:
Before we talk about how to clone a GitHub repository, the question we need to ask is why we even need to clone a repository.
Suppose you want to use some code that is available on GitHub as a public repository, you can copy the contents of that repository to your local system using GitHub’s cloning feature.
Let’s say we want to play around with the code of screencasts repository of user curran:
We can clone al the code of screencasts repository to our local system, and this is an illustration of how it’s done.
We create a local folder curranD3 and change the current directory to curranD3 and clone the remote repository under curranD3:
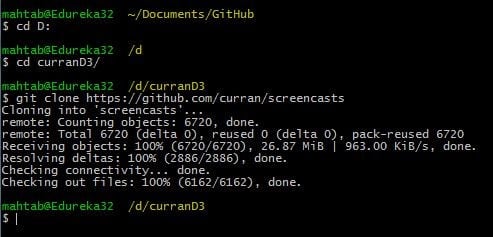
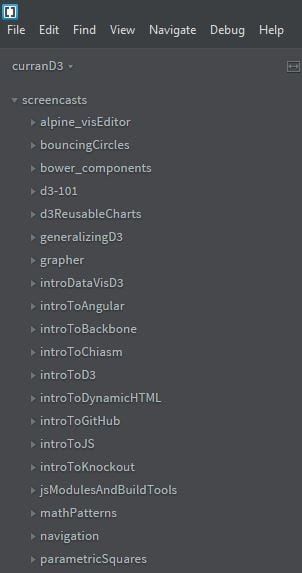
Once the entire repository is cloned to your local system, you can notice that all the code is copied the same under the screencasts folder as shown here:
Next up, we are going to talk about how to fork a GitHub repository and understand when we need to do it:
A lot of times, you might need to create your own GitHub repository of a project that is already available. For this, we can fork the original GitHub repository to create one under our own GitHub account.
Before we start with how to fork a repository, there are some important points to note about forking
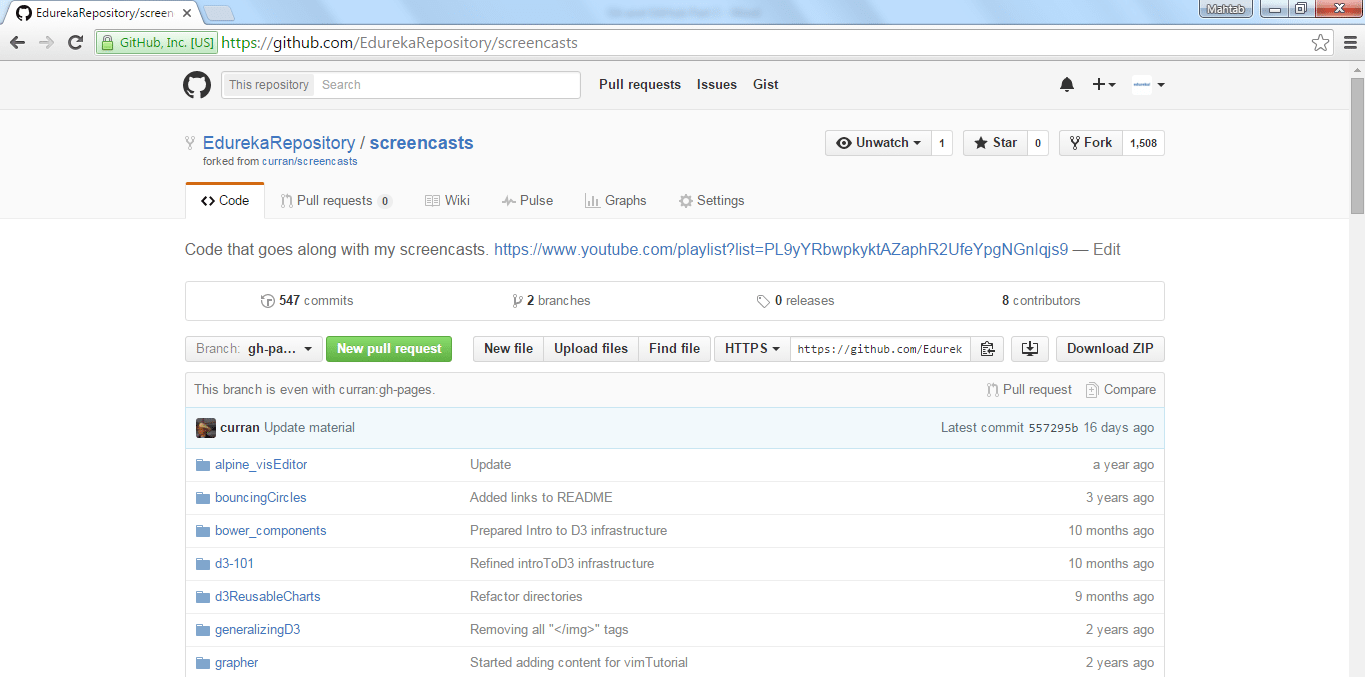
Forking a GitHub repository is very simple. We will use the same repository (curran’s screencasts repository) but this time we will fork it. To fork a GitHub repository, just click on the Fork link at the upper right corner of the GitHub repository.

Note that curran’s screencasts repo is already being forked 1507 times. Let’s fork it by clicking the Fork link and you will see that repository under our account as shown here:
Next, we are going to learn about Github Gist, understand what it is and how to use it?
Gists are a great way to share your work. You can share single files, parts of files, or full applications. Other people can search for gists. You can access gists at https://gist.github.com. Gists are usually used to share small piece of code. There are two types of gists; public and secret.
Public Gists show up in Discover, where people can browse new gists as they get created. They are also searchable, so you can use them if you’d like other people to find and see your work.
Secret Gists don’t show up in Discover and are not searchable. But note that secret gists aren’t private. If you send the URL of a secret gist to a friend, they’ll be able to see it.
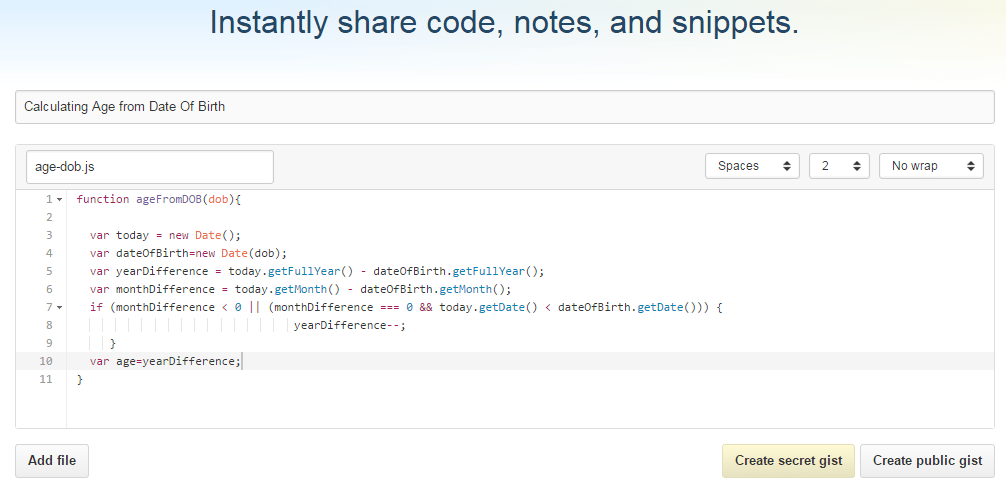
Creating a Gist: Creating a gist is quite simple. Simply click on the Gist link on GitHub page.
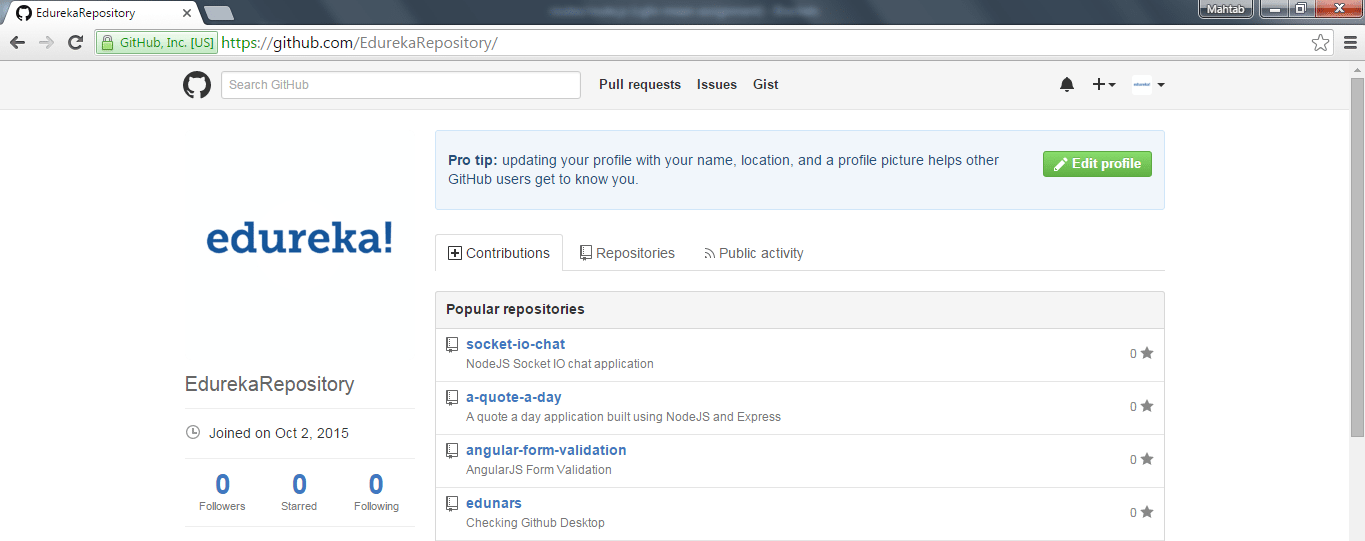
Here, we have created a GitHub gist named age-dob.js, which calculates the age from the given date-of-birth. Note that we automatically get JavaScript syntax highlighting as we have used the extension .js with the gist name. Click on Create Public Gist to create a public gist.
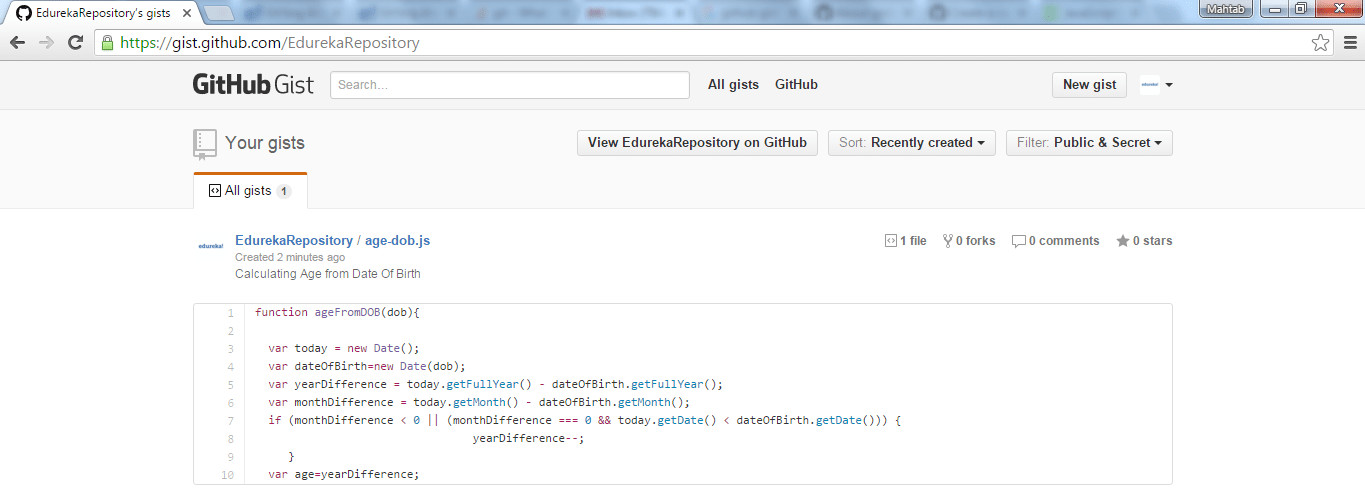
Accessing all your Gists: You can access all your gists at https://gist.github.com/GITHUB_USERNAME
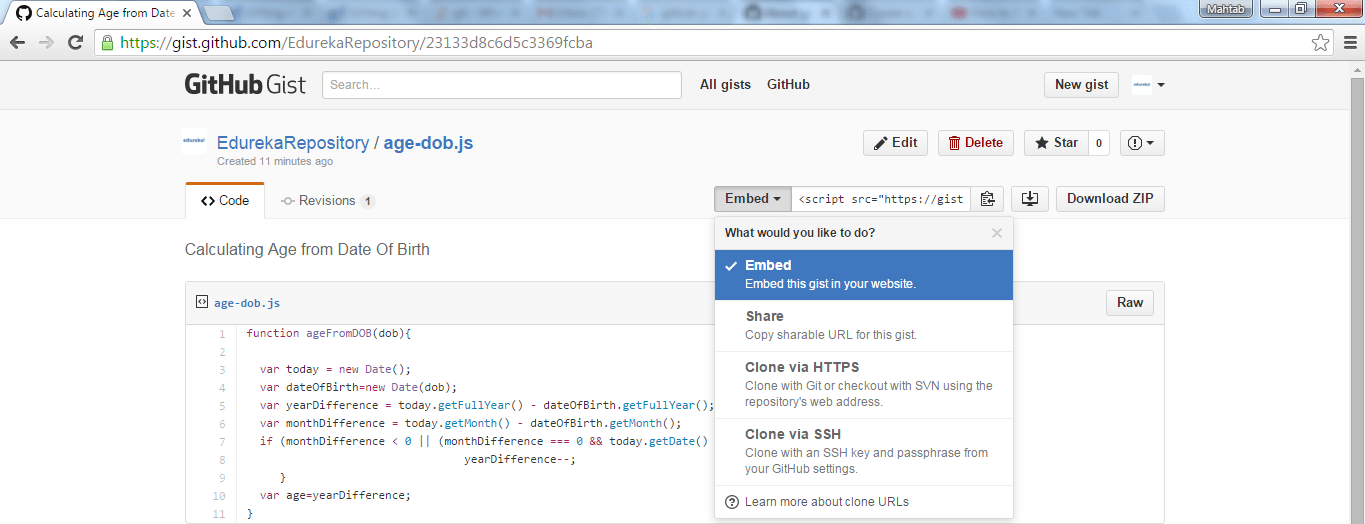
Suppose you want to show the GitHub gist on your website, all you need to do is to embed the GitHub gist on your website, click on the Embed option as shown here:
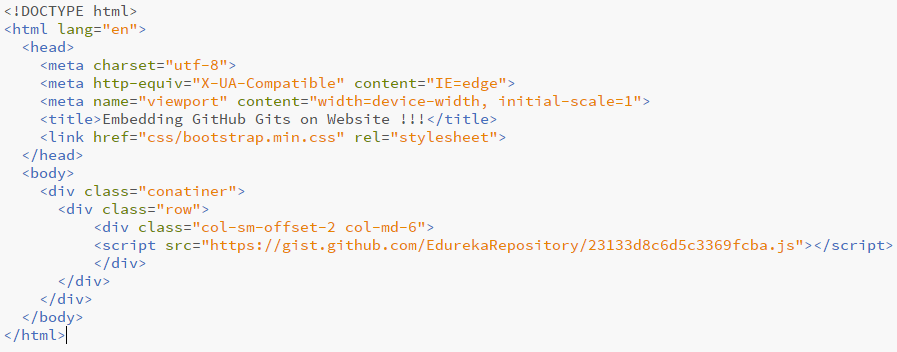
Copy the link and use that link in your HTML file to embed the GitHub gist on the webpage as shown here:
This is how the embedded GitHub gist will look like. gist.

That’s all for this post, hope you enjoyed it and found it helpful. All the best!
Got a question for us? Please mention it in the comments section and we will get back to you.
Related Posts:
Get Started with Mastering Git and Github
 Thank you for registering Join Edureka Meetup community for 100+ Free Webinars each month JOIN MEETUP GROUP
edureka.co