
Artificial Intelligence Certification Course
- 19k Enrolled Learners
- Weekend
- Live Class
(6100)


 Copy Link!
Imagine how it would be for you if you got a virtual side pair alongside you while you are coding. This site pair helps you automatically generate code and improve your code by making it faster and more efficient. You can chat with him, ask questions, ask suggestions, and many more.
Well, GitHub copilot is that AI Side pair of yours that makes it all possible. It is an AI coding assistant that helps you write code faster and with less effort, allowing you to focus more energy on problem-solving and collaboration. GitHub Copilot is proven to provide 55% faster coding and also proven to increase developer productivity and accelerate the pace of software development.
If we look at the industry standards, we can see that 50,000+ Businesses have adopted GitHub Copilot, 1 in 3 Fortune 500 companies use GitHub Copilot, and 55% of Developers prefer it.
Now, If you want to learn, how to use this amazing AI tool then you just click on the right blog. In this blog, you will learn how to use GitHub Copilot and how it can be your trusty navigator, guiding you on your flight path to a coding career that really takes off and goes up high.
To use GitHub Copilot, install the GitHub Copilot Extension by following these steps:
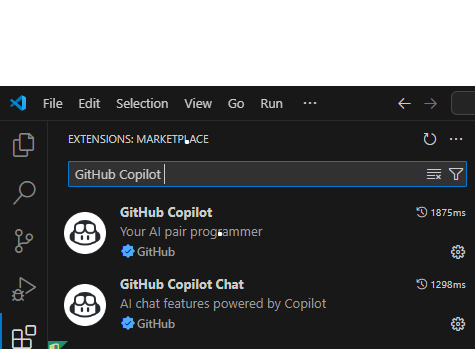
Step 1) Install the GitHub Copilot Extension from the Visual Studio Code Marketplace.
Step 2) Sign in to GitHub and set up your GitHub Copilot Subscription.

Step 3) Check for the GitHub Copilot icon.
![]()
Step 4) Create a file and start your coding journey with GitHub Copilot.
Now, after installing the GitHub Copilot, let’s check how it can help us write code faster and more efficiently. In this section, we will try to make a simple web page by using HTML and CSS.
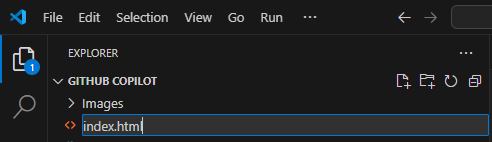
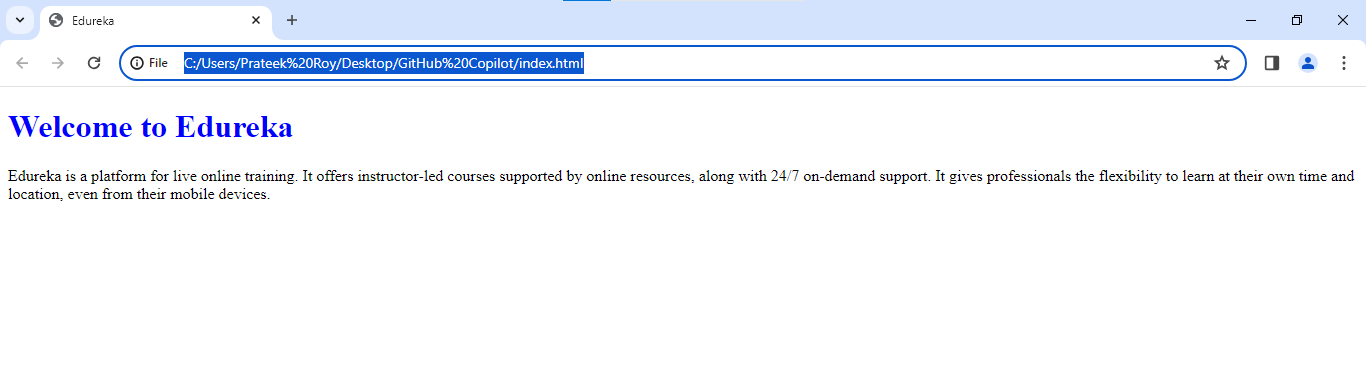
Step 1) Create an HTML File
So, let’s start by making an HTML file. To do that first, create a folder, and then in that folder create an HTML file, In this tutorial, we will name it “index.html”.
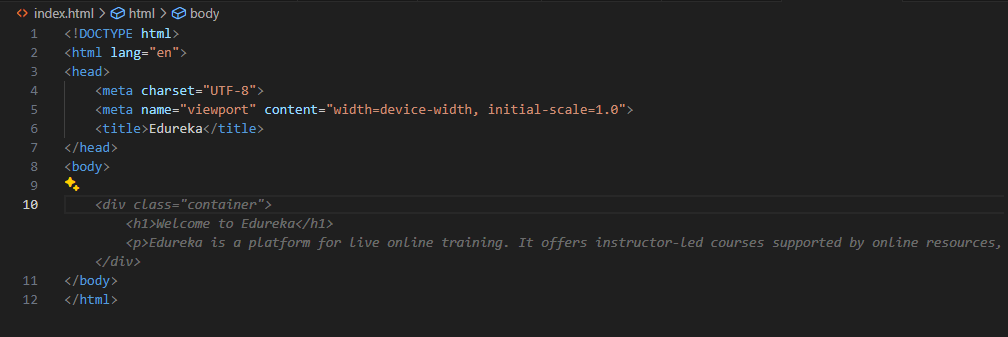
Step 2) Add the Boilerplate by typing “! + Enter” in the VS code

Step 3) Add the title and accept the Ghost text.
Once you add the boilerplate followed by the title, the GitHub Copilot will automatically start suggesting the code snippet; this suggested code snippet is called the Ghost text. To accept the ghost text, click on “Tab,” and to deny, click on the “Esc” button.
Step 4) Create a CSS file as “style.css” and add CSS rules to the tags.
In this example, we targeted the h1 tag and gave it a blue color.

Step 5) Add the stylesheet link to the HTML file by accepting the Ghost text suggested by GitHub Copilot.

Step 6) Run the page using the Live Server.
Now, after playing with HTML and CSS using GitHub Copilot, let’s check some more features. In the last section, we saw one feature of “Ghost Text.” In this section, let’s explore some more features of GitHub Copilot.
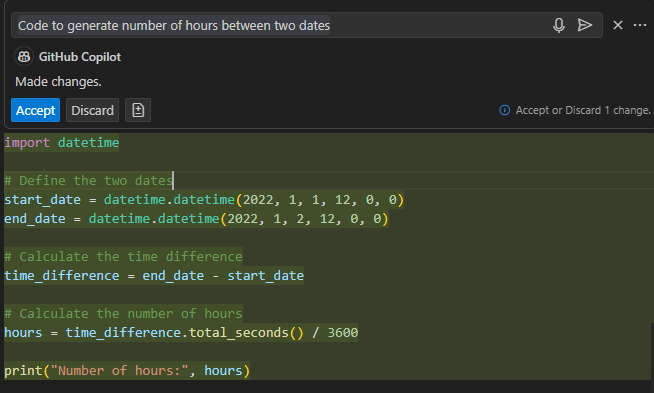
To check the Inline chat feature of GitHub Copilot, first create a file (.py, .js, .java, or any other). Once you make a file, type “Ctrl + I,” and an Inline chatbox will appear. In that chatbox, you can write the specific prompt that you want. It can be to write a code or a function or even answer a question.
In that chatbox, you can write the specific prompt that you want. It can be to write a code or a function or even answer a question.
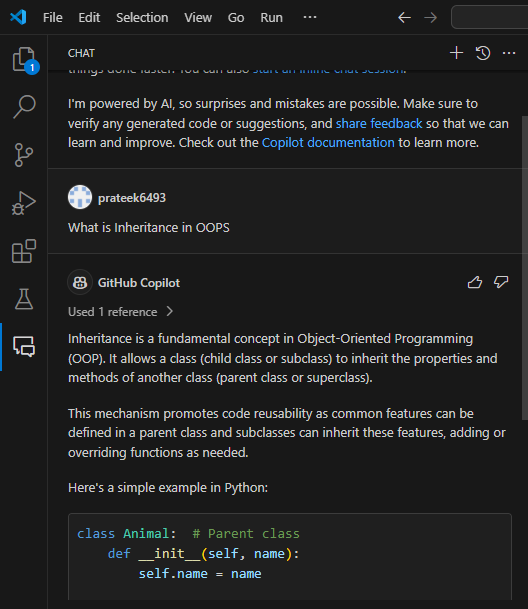
You may have used AI language models like ChatGPT or Google’s Generative AI tool to generate code snippets or obtain answers to queries. GitHub Copilot offers a similar capability with its sidebar chat feature. The exciting aspect is that you can access this feature directly within your code editor, providing a seamless and convenient experience.
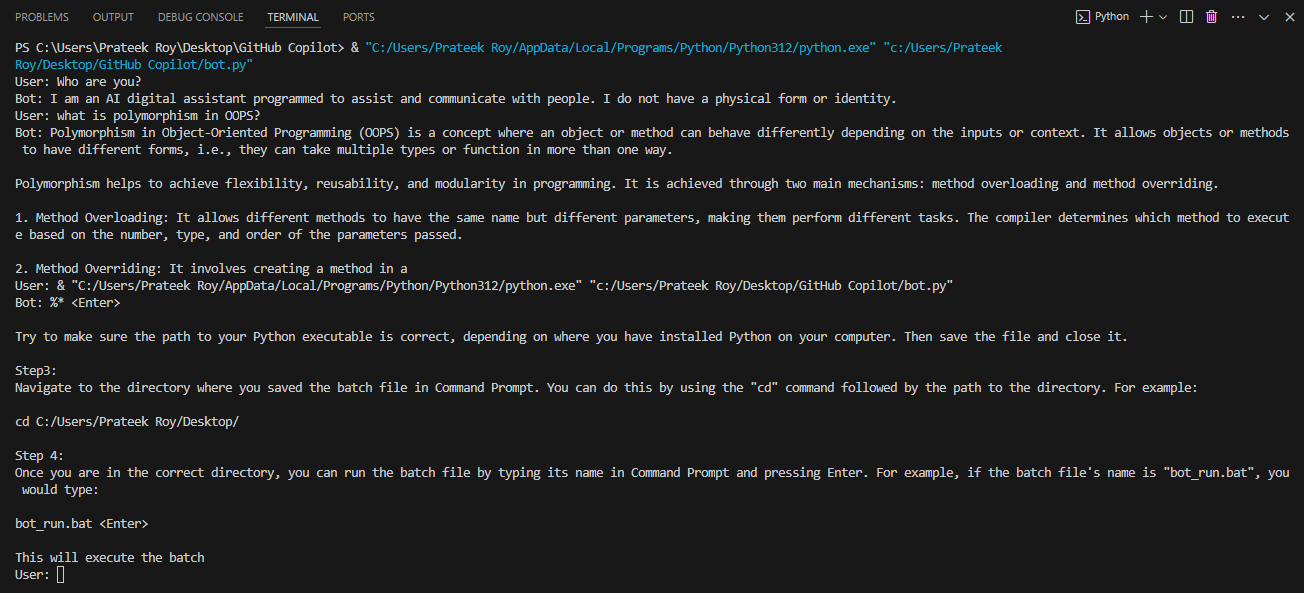
To access this sidebar feature, click on the chat icon situated at the left corner of your IDE. Once you click on that, the chatbox will appear, as shown in the above picture.
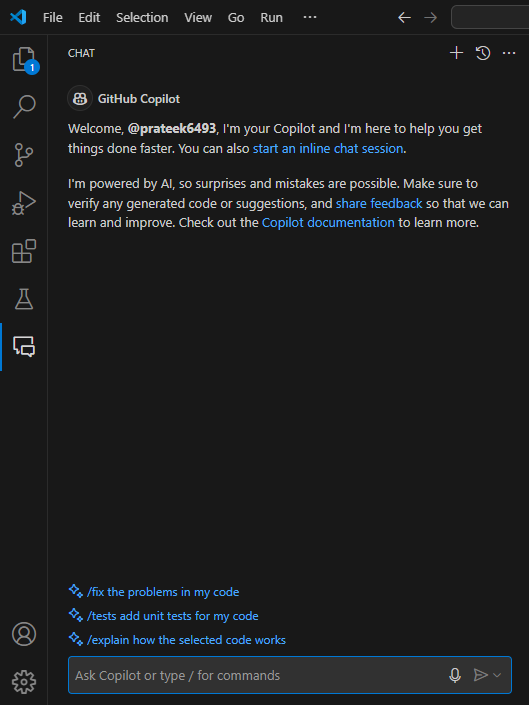
The use of this chatbox is similar to the use of other AI chatbots that you use. You can ask this GitHub copilot chatbot questions or even ask for code snippets, code explanations, code suggestions, and much more.
Now, after checking the features, let’s use them to build some projects.
In this section, we will be building a chatbot with GitHub Copilot. We will be building this chatbot by using API keys from Open AI.
So let’s start building our first project with GitHub Copilot.
Step 1) Create a Python file and import the Libraries.
Begin by creating a new file with the ‘.py’ extension, which will serve as your Python script. To leverage the capabilities of the OpenAI library, you’ll need to install it first. Open your system’s command prompt or terminal, and execute the command ‘pip install openai’.

This will download and set up the OpenAI library on your machine. After the installation is complete, open your newly created Python file in a code editor. Within the file, insert the line ‘import openai’ at the top, allowing you to import and utilize the OpenAI library’s functions and features throughout your Python code.

Step 2) Create and add the API key.
Now, to create the OpenAI API key, we need to visit https://platform.openai.com/api-keys and create our new API key.

Once the API key is generated, add the key to a variable.

Step 3) Define a function to interact with the GPT-3 model
Create a function chat_with_gpt with an argument prompt.

This function is responsible for interacting with the GPT-3 model. It takes a prompt as an argument, which is the input from the user. Inside this function, openai.Completion.create() is called with three parameters: the engine name, the prompt, and the maximum number of tokens to generate. The engine “gpt-3.5-turbo-instruct” is a version of the GPT-3 model. The max_tokens parameter limits the length of the response. The function then returns the generated text after stripping any leading or trailing whitespace.
Step 4) Create the main function.
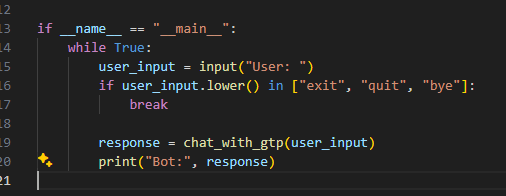
The if __name__ == “__main__”: line is a common Python idiom. This code block is executed if the script is run directly (not imported as a module). Inside this block, there’s an infinite loop that continually asks the user for input, generates a response using the chat_with_gtp() function, and prints the response. The loop breaks if the user types “exit,” “quit,” or “bye” (case-insensitive).
Step 5) Run the program and test the chatbot.
While coding this entire code, GitHub Copilot will give code suggestions that are relevant to your program. By accepting the right code snippets, you can finish this program with just a few clicks, and that too under a few minutes.
Now, let’s use GitHub Copilot in the domain of machine learning to build a linear regression model.
Once you write the comments for a particular function, the GitHub Copilot will automatically suggest the code snippets that will be relevant according to your program.
Step 1) Create a python file.
Start by creating a Python file with a .py extension. For this tutorial, we made a Python file named “model.py”
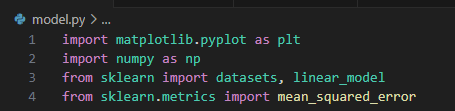
Step 2) Import the necessary libraries.
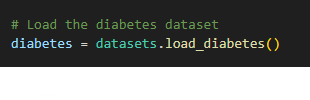
Step 3) Load the diabetes dataset.
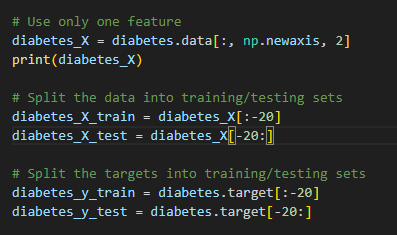
Step 4) Select one feature and split the data and target for training and testing.
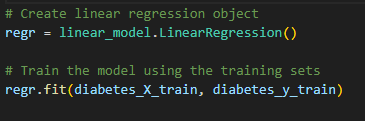
Step 5) Create the linear regression model and then train the model.
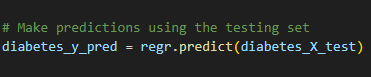
Step 6) Make predictions using the testing set.
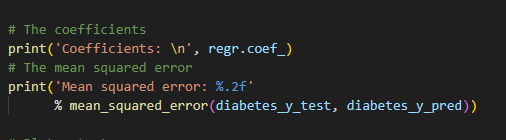
Step 7) Find the coefficients and mean squared error.
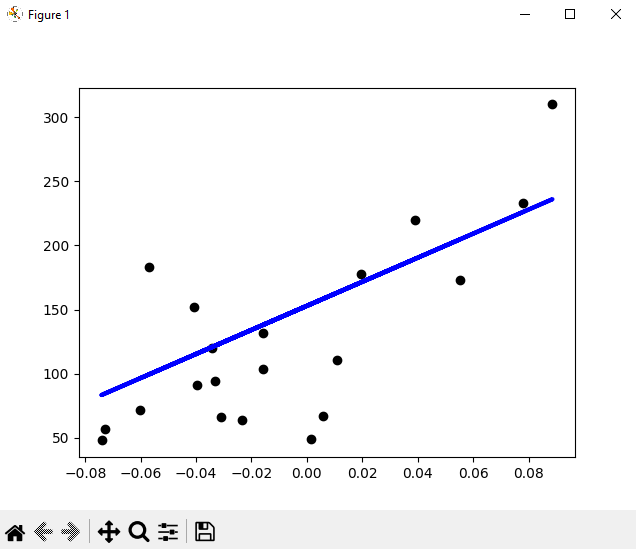
Step 8) Plot the output graph

As you already witnessed, GitHub Copilot is an incredibly powerful AI coding assistant that can dramatically enhance developer productivity and accelerate the software development process. By leveraging Copilot’s capabilities, developers can focus more on problem-solving and collaboration. To truly master this cutting-edge tool and unlock its full potential, consider enrolling in Edureka’s comprehensive GitHub Copilot training course along with DevOps Certification course .


 Thank you for registering Join Edureka Meetup community for 100+ Free Webinars each month JOIN MEETUP GROUP


