


There are numerous frameworks and libraries for front-end development. One of the most famous and widely used libraries for front-end development is React. It’s not a framework.
Just so you know, it is an open-source JavaScript tool created by Facebook that is used for front-end development. You can make great user experiences for web apps with its component-based library.
What is React in Frontend Development?
It is a library written in JavaScript and lets you make user interfaces for web apps.
It is an important part of building websites today. It was made in 2013 by Facebook, which is now called Meta. It lets developers break up complicated user interfaces into parts that can be used again and again, like buttons, menus, or forms. This speeds up progress and makes it easier to keep up with the times.
React Frontend Development – why choose it?
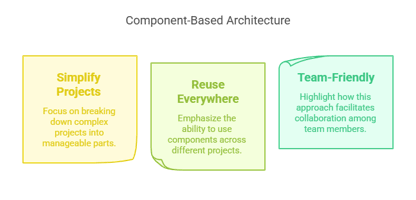

It lets you create apps by breaking them into small, reusable pieces called components. Think of it like building with LEGO:
- Simplify complex projects: Instead of coding a massive webpage all at once, you build buttons, headers, or forms separately and snap them together.
- Reuse everywhere: Need the same navigation bar on 10 pages? Build it once, reuse it everywhere. Updates to one component automatically apply everywhere it’s used.
- Team-friendly: Developers can work on different parts of the app (e.g., a login form vs. a dashboard) without stepping on each other’s toes.
2. Virtual DOM:
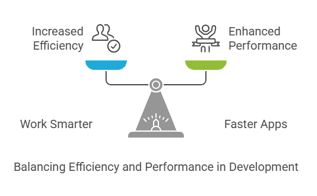

- Work smarter, not harder: Instead of redrawing the entire page when something changes (like a live chat message), it compares the new and old versions behind the scenes and only updates what’s different.
- Faster apps, happier users: This means your app feels snappier, even with heavy data (like a social media feed or dashboard).
3. Ecosystem & Community:
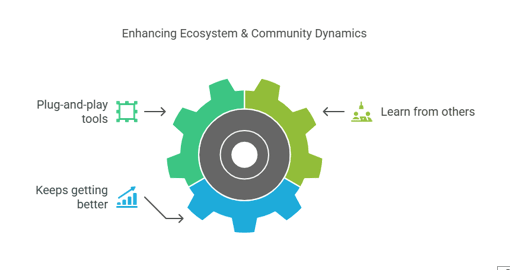

- Plug-and-play tools: Need user authentication? Add Auth0. State management? Use Redux. Want SEO? Pair It with Next.js. There’s a pre-built solution for almost everything.
- Learn from others: Millions of developers use itit, so if you’re stuck, forums like Stack Overflow or free tutorials on YouTube have your back.
- Keeps getting better: Meta (Facebook’s parent company) and the community constantly improve it, so you’re not stuck with outdated tech.
4. JSX:


- Readable code: Instead of juggling separate HTML and JavaScript files, you write everything together. For example, you can loop through data and design its layout in one place.
- Intuitive workflow: Its component-based approach makes it easier to manage UI elements. You build reusable components, keeping your code clean and modular.
5. Cross-Platform Magic:
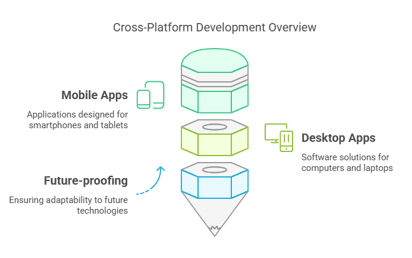

- Mobile apps: With React Native, use the same skills to build iOS/Android apps (used by Instagram, Airbnb, and Uber Eats).
- Desktop apps: Turn your web app into a Windows/Mac/Linux program using tools like Electron (e.g., Slack, Discord).
- Future-proofing: As new platforms emerge, their ecosystem adapts, so your skills stay relevant.
6. Unidirectional Data Flow:
It enforces a clean, one-way flow of data:
- Parent to child only: Data passes down from parent components (like a homepage) to children (like a sidebar or footer). This avoids messy bugs where two components accidentally overwrite each other.
- Easier debugging: If something breaks, you can trace the issue step-by-step instead of hunting through tangled code.
7. Job Market Goldmine:

- High demand: It is used by Companies like Netflix, PayPal, and Tesla
- Future-proof: its popularity isn’t fading—it’s a safe bet for long-term career growth.
React JS Tutorial For Beginners

Creating Front-End Web Development using React
Step 1: Install Node.js
To check where Node.js and npm are installed properly, we will open our terminal and write the command:
node -v
Step 2: Install Create React App
Now that Node.js is installed, we can install Create React App (CRA). CRA is a Facebook-developed tool that creates a new React project with one command. It takes care of all the complicated configurations (such as Webpack and Babel) for you, so you can just write code.
To install Create React App globally on your system, execute the following command in your terminal:
npm install -g create-react-app
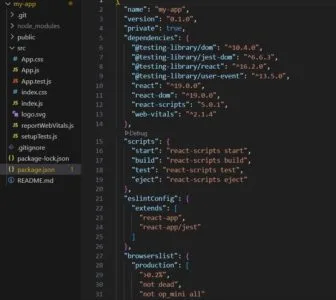
Step 3: Build a New React App
Having installed the Create React App, now’s the time to build your initial application. Let’s give it the name my-app (you may have any name, but here, we’ll proceed with the name my-app).
Execute the command below:
npx create-react-app my-app
Below is the output after the execution of the command:


Step 4: Navigate to the Project Directory

Now that your project is created, you’ll need to navigate into the project folder. In your terminal, run:
cd my-app
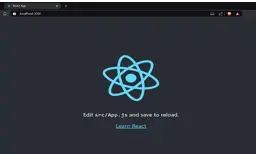
Step 5: Start the Development Server
So, you can immediately start the app by going into the newly created application folder and running:
npm start
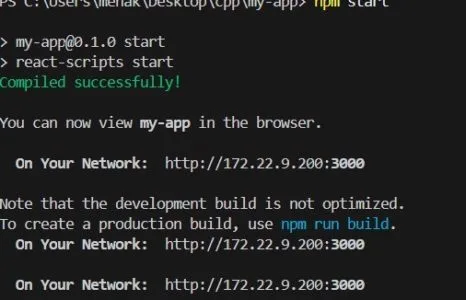

Project Structure:Output:


Examples of React JS Development
Component Example
Components are reusable in React.js. There are two main types of components:
- Stateless (Functional) Component – No internal state, just props.
- Stateful (Class) Component – Has its own internal state.
Stateless (Functional) Component Example
A simple component that displays a welcome message:
import React from "react";

const Welcome = (props) => {
  return <h1>Welcome, {props.name}!</h1>;
};

export default Welcome;
Stateful (Class) Component Example
A counter component using state:
import React, { Component } from "react";

class Counter extends Component {
  constructor(props) {
    super(props);
    this.state = { count: 10 };
  }

  increment = () => {
    this.setState({ count: this.state.count + 2 });
  };

  render() {
    return (
      <div>
        <h3>Counter: {this.state.count}</h3>
        <button onClick={this.increment}>Increment</button>
      </div>
    );
  }
}

export default Counter;
Fragment Example
Fragments are a method to render several elements without a wrapper element. When trying to render elements not having an enclosing tag in JSX, you will receive the error message Adjacent JSX elements must be wrapped in an enclosing tag.
This is because when JSX transpiles, it’s building elements with their respective tag names, and has no idea what tag name to use if several elements are encountered.
The fragment is a wrapper without the DOM clutter of additional divs. You can call it directly from the React import, or you can destructure it:
Basic Example using
import React from "react";

import React from "react";

const Blog = () => (
  <>
    <h2>Understanding React Fragments</h2>
    <wp-p>React Fragments allow grouping elements without adding extra nodes.</wp-p>
    <wp-p>They improve performance and keep the DOM clean.</wp-p>
  </>
);

export default Blog;
// Deconstructed
import React from "react";

const UserList = () => {
  const users = ["Mahak", "Aarav", "Priya", "Rohan"];

  return (
    <>
      <h2>Users</h2>
      <ul>
        {users.map((user, index) => (
          <li key={index}>{user}</li>
        ))}
      </ul>
    </>
  );
};

export default UserList;
The same example using the short syntax for Fragments:
return (
  <>
    <h2>Users</h2>
    <ul>
      {users.map((user, index) => (
        <li key={index}>{user}</li>
      ))}
    </ul>
  </>
);
JSX Example
JSX stands for JavaScript XML. It is an expression that applies valid HTML statements in JavaScript. You can save this expression into a variable and reuse it elsewhere.
You can combine other valid JavaScript expressions and JSX into these HTML statements by bracing them ({}). Babel also transcompiles JSX to an object of type React.createElement().
Example:
import React from "react";

const Hello = () => {
  const firstName = "Roshan";
  const isLoggedIn = true;

  return (
    <div>
      <h1>Hello, {isLoggedIn ? firstName : "Guest"}!</h1>
      <wp-p>Welcome to our blog!</wp-p>
    </div>
  );
};

export default Hello;
State Example
The state holds the data for a component. In this example, a class component initializes state in the constructor with title and subtitle. The changeTitle function updates the state using,this.setState() triggering a re-render. When the “Change Title” button is clicked, the text updates dynamically.
This simple example highlights key concepts like state management, event handling, and reactivity—essential for understanding how components update when the state changes.
Example:
import React, { Component } from "react";

class App extends Component {
  constructor(props) {
    super(props);
    this.state = {
      title: "Welcome to React!",
      subtitle: "Click the button to change the title!",
    };
  }

  changeTitle = () => {
    this.setState({
      title: "React State Updated!",
      subtitle: "You clicked the button!",
    });
  };

  render() {
    return (
      <div>
        <h1>{this.state.title}</h1>
        <h2>{this.state.subtitle}</h2>
        <button onClick={this.changeTitle}>Change Title</button>
      </div>
    );
  }
}

export default App;
State VS Props Example State: The Memory
- Internal data that the component controls
- Can (and should) be updated by the component
- Updates trigger a rerender
The state is your component’s memory. While props are like receiving a message, the state is like keeping your notes that you can update whenever you want. Here’s the key thing about the state: use it when your component needs to keep track of information that can change. Simple as that.
Example:
import { useState } from "react";

function Counter() {
  const [count, setCount] = useState(0);

  return (
    <div>
      <wp-p>You clicked {count} times</wp-p>
      <button onClick={() => setCount(count + 1)}>Click here!</button>
    </div>
  );
}

export default Counter;
Props: The Messenger
- Read-only data that comes from outside
- Can’t be changed by the component
- Update only when the parent rerenders
Props are honestly pretty simple—they’re just data that gets passed into your component from the outside. Think of props as function parameters. Just like you can pass arguments to a function, you can pass props to a component.
Example:
function Hello({ name }) {
  return <h1>Hey {name}!</h1>;
}

export default Hello;
Conclusion
The component-based architecture, Virtual DOM for better speed, and huge ecosystem of apps that use React have changed the way front-end development is done.
Modern developers need tools that are flexible and quick, like this, so they can make dynamic web apps, mobile apps with React Native, or even PC apps. Because of how in-demand it is, it’s a great skill to learn if you want to move up in your work.
React.js Training course is the best place to start if you want to learn it and make apps that look like professionals made them. This class goes over the basics of React and more advanced ideas like state management, hooks, and making projects in the real world.
With practical training and projects that are important to your field, you’ll gain the confidence to make interactive web apps quickly.
FAQs
Are React developers and front-end developers the same?
A front-end developer builds the front end of a website or web app using technologies like HTML, CSS, JavaScript, and frameworks.
How do I become a React front-end developer?
After learning HTML, CSS, and JavaScript, you can become a React front-end coder. Learn how to use components, state management, and hooks in React.js next. Help yourself learn by working on projects and utilizing tools like Git, APIs, and UI packages.
Should I use React for the front end?
For the front end, React is a great choice. It has a strong developer community, reuse parts, and fast rendering, which makes it perfect for making scalable and interactive web apps.